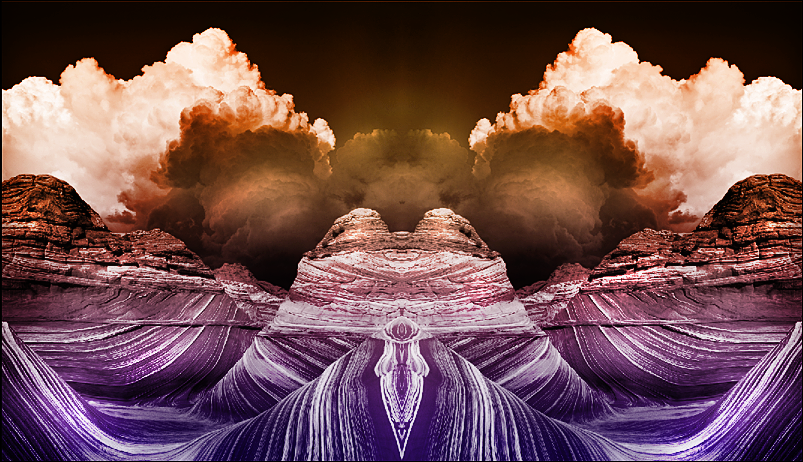
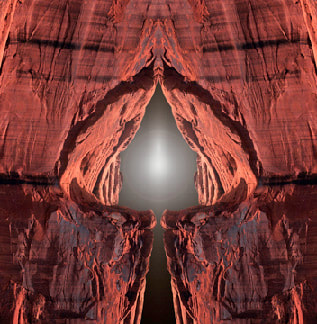
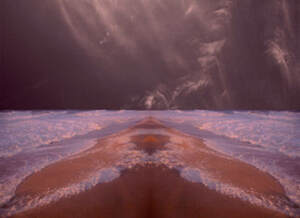
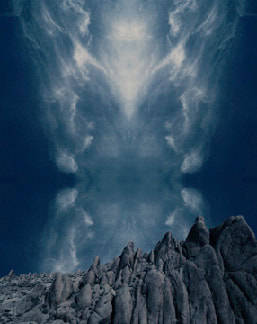
Symmetrical Landscape

Directions
This project involves ideas of mirrored image reflection, based on the style of digital photographer John Paul Caponigro.
This project involves ideas of mirrored image reflection, based on the style of digital photographer John Paul Caponigro.
|
|
|
For this project, please use images photos of nature on these sites:
Art & Design Concepts in this lesson...Principle of Art - Balance
Symmetrical balance can be described as having equal "weight" on equal sides of a central axis. It is also called formal balance because a form (formula) is used -- a mirror image about a vertical axis. The results look formal, organized and orderly. When the elements are arranged equally on either side of a central axis, the result is Bilateral symmetry. This axis may be horizontal or vertical. It is also possible to build formal balance by arranging elements equally around a central point , resulting in radial symmetry.
- pexels.com
- pixabay.com
- unsplash.com
- freephotos.cc
- stocksnap.io
Art & Design Concepts in this lesson...Principle of Art - Balance
Symmetrical balance can be described as having equal "weight" on equal sides of a central axis. It is also called formal balance because a form (formula) is used -- a mirror image about a vertical axis. The results look formal, organized and orderly. When the elements are arranged equally on either side of a central axis, the result is Bilateral symmetry. This axis may be horizontal or vertical. It is also possible to build formal balance by arranging elements equally around a central point , resulting in radial symmetry.
Watch the Video Tutorial (NO AUDIO)
|
Step 1 Open up two landscape (outdoor nature) images from the graphics on 'lths.org\lockport'> Computer Art folder > Projects > Photoshop > Symmetrical Image folder or... use photos of nature on these sites:
Work the sky image first 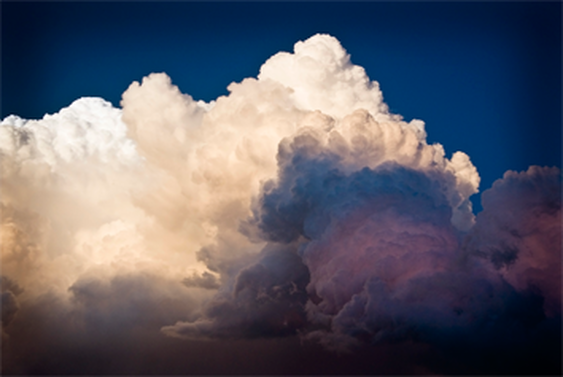
Step 2 Copy the entire image by going to: Select Menu > All and then, Edit Menu > Copy Step 3 You are going to add canvas to the image so we can take the copied image (step 2 above) and mirror that image in the new canvas area and seam the image together. Image Menu > Canvas Size Anchor the image to the left side or right side (this depends on what side you want to mirror or seam to be) by clicking on the on the small square in this grid Look at the Width of the image Enter a number for the Width that is double the current number or change the drop-down to percent and enter 200 Click OK Canvas is added either to the left or right side of your picture 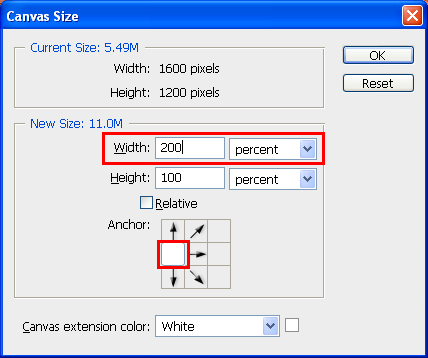
Step 4 Now go to Edit Menu > Paste Edit Menu > Transform > Flip Horizontal 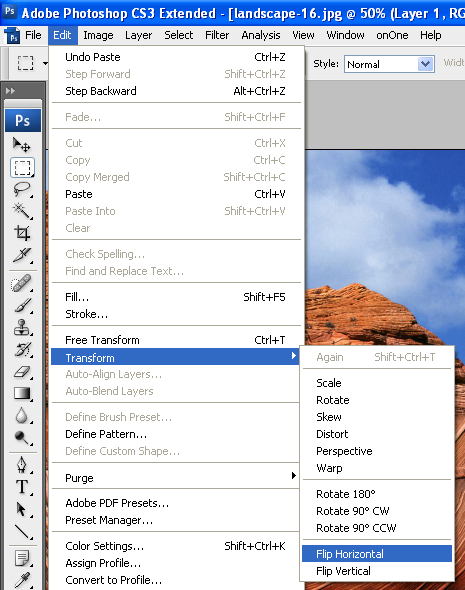
Step 5 Select and use the Move tool while holding down your Shift key click on the layer (image we just pasted) and drag across into the blank canvas area we added and let go. Your first image will now be a mirrored reflection. 
Align these up so they fit together with no space between them. Magnify this image using the Ctrl and + key to see this better. Press Ctrl + several times to zoom in. Use the right and left arrow keys on the keyboard to move the image 1 pixel at a time into the open area where extra canvas was added
Step 6 Once this is done you need to flatten these 2 layers together Go to Layer Menu > Flatten image 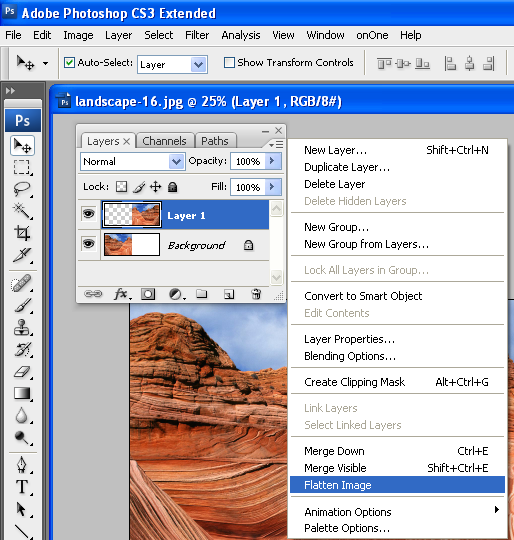
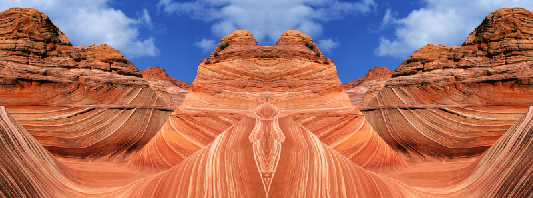
Step 7 Now go to your second image – the land/water image 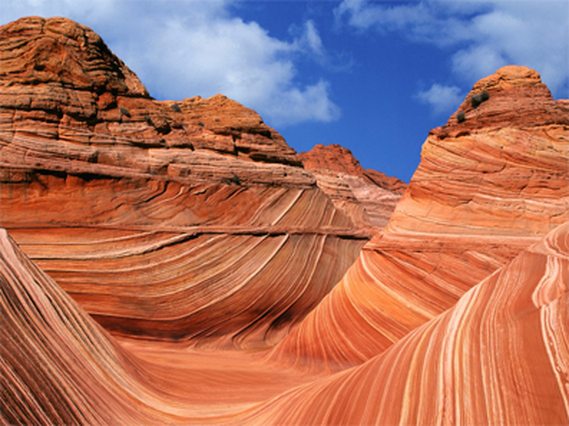
Repeat the procedure you just did on this image
Remember to flatten the layers of image 2 when you are done You should now have two files. Save each one to your student folder 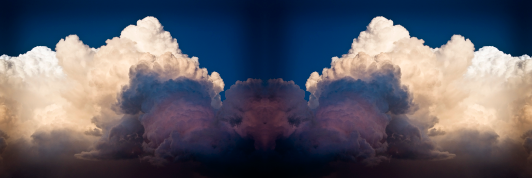
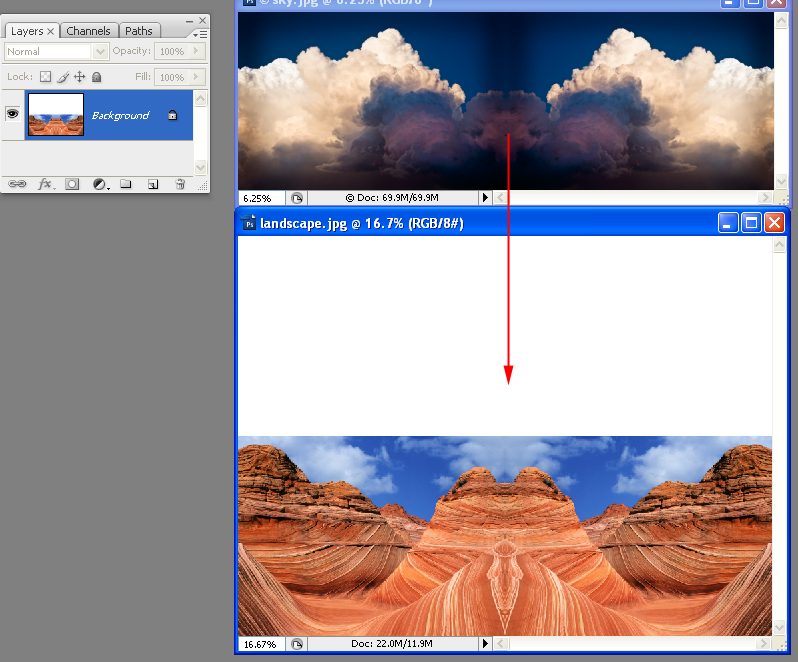
Step 8 Once this is completed we need to add extra canvas on the land image to combine the images together On the land image, add extra canvas to the top. Anchor the image on the bottom by clicking on the on the small square Enter a number for the Height that is double the current number or change the dropdown to percent and enter 200 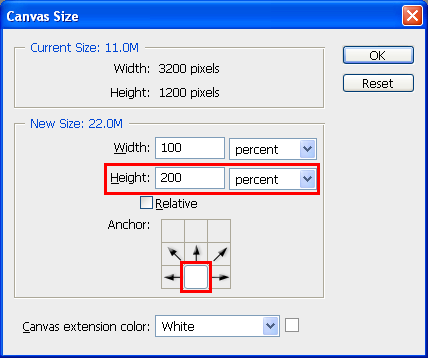
Step 9 Select and use the Move tool and then drag and drop the sky image while holding down the Shift key into the land image Use the up or down (if needed) arrow keys on the keyboard to move the image 1 pixel at a time into the open area where extra canvas was added 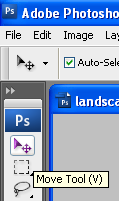
Step 10 Lower the Opacity of the layer to around 50% Add a Layer Mask to the sky image Using Black as your color, paint in the mask to hide the bottom part of the sky image, and blend the new sky into the land/water Do this with a hard edge paintbrush as neatly as possible, to achieve the best looking composite 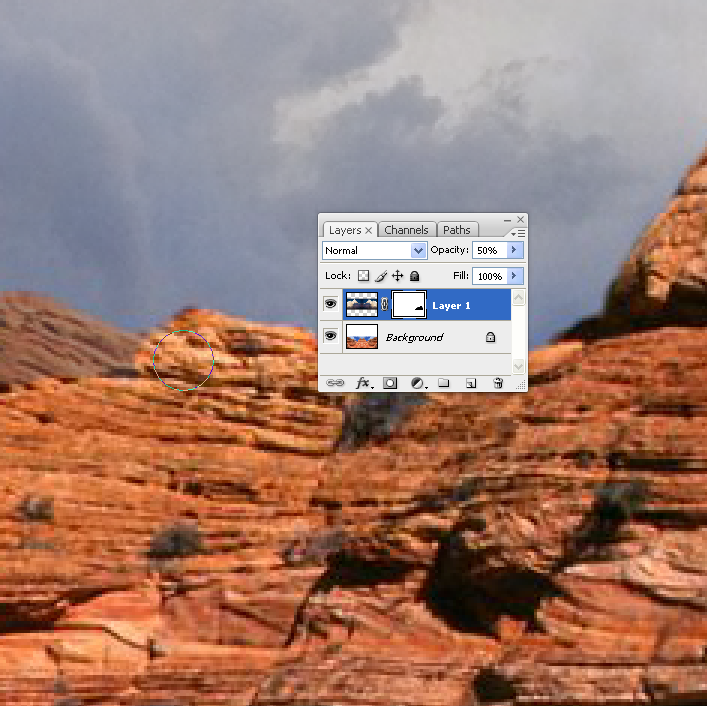
Bring the Opacity of the layer back up when you are finished 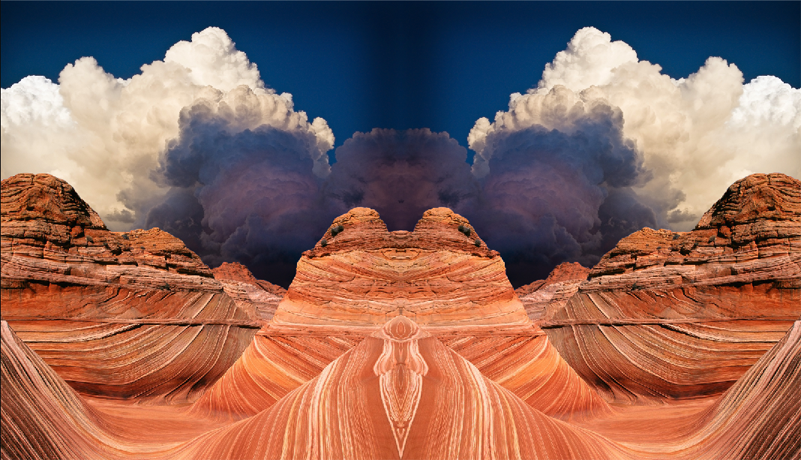
Step 11 Remove the color in this image by going to Image Menu > Adjustments > Black & White Adjust sliders or use the preset drop down section and increase the contrast (make it have a good range dark and light areas) 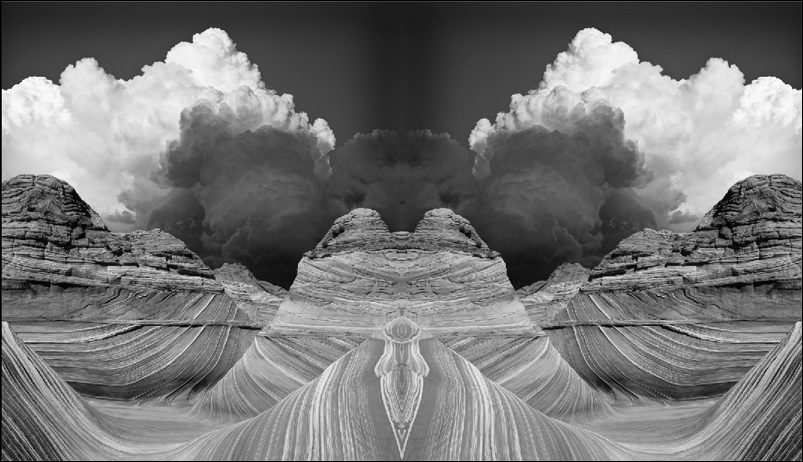
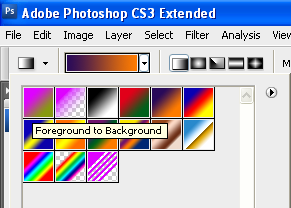
Step 12 - (Complete only if your bottom image has water) Copy the sky image – Select the sky layer then Press Ctrl +J - and flip it vertical Edit Menu > Transform > Flip Vertical - to put a reflection of the sky in the water The layers Opacity should be lowered to around 20-40% Step 13 Next add a blank layer - Layer > New Layer at the very top of all other layers and change the Layer blend mode to Overlay Select the Gradient tool 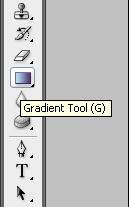
Click in the gradient bar and select a gradient. Click the circle with the triangle and load other gradients if you want other colors
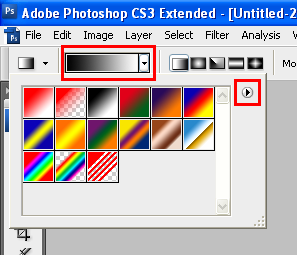
You can also pick 2 colors first and use these colors for your gradient
Step 14 Now click and drag inside your image with the gradient tool to add your color Adjust the opacity to a lower percent like 80 if the color is too strong 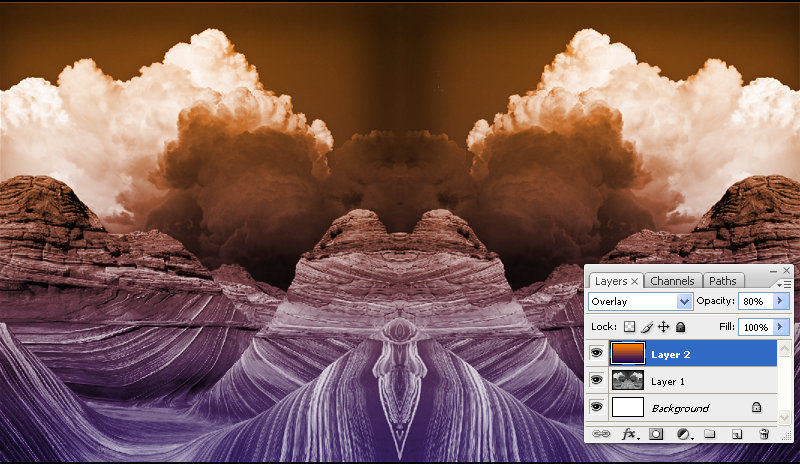
Step 15 Finally I selectively painted with the Dodge and Burn Tools on another layer above filled with 50% gray and the Blend mode set to Overlay to make areas lighter or darker on both the sky layer and water layer. 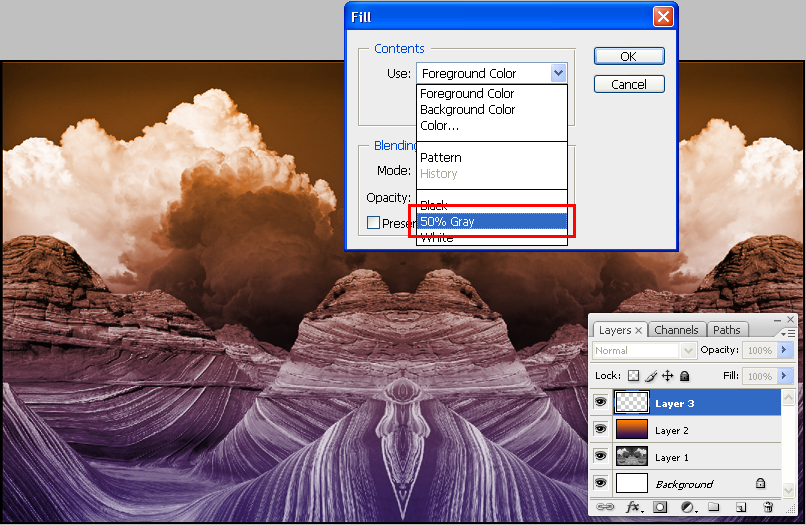
Step 16 Save image to your Google drive folder as SymmetricalLandscape.psd and turn into Google Classroom for Grading when finished. |
Final Image