Naturemorphosis
Directions
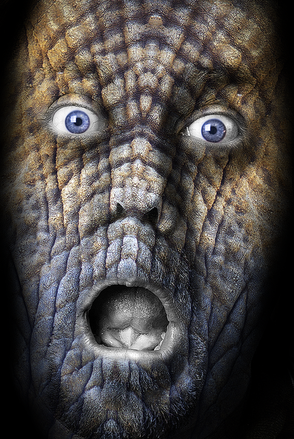
Naturemorphosis is meant to show the middle of a process called metamorphosis. Just like tadpoles change to frogs, naturemorphosis gives an insight into a process where human beings morph and combine with nature (leaves, rock, water textures) or animals (skins textures).
Using the images I took of you in class create series of 3 naturemorphosis images using 2 or 3 different pictures of you and 3 different skins (textures)
Use Selections (Refine Edge), Layer Masks, Layer blending modes, Adjustment layers and the Dodge and Burn tools to combine your face and replace your skin with nature textures or animal skins.
For this project, use the photos I took of you in class and images thru either:
- pexels.com
- pixabay.com
- unsplash.com
- freephotos.cc
- stocksnap.io
You could also find images on Flickr images thru https://www.flickr.com/search/
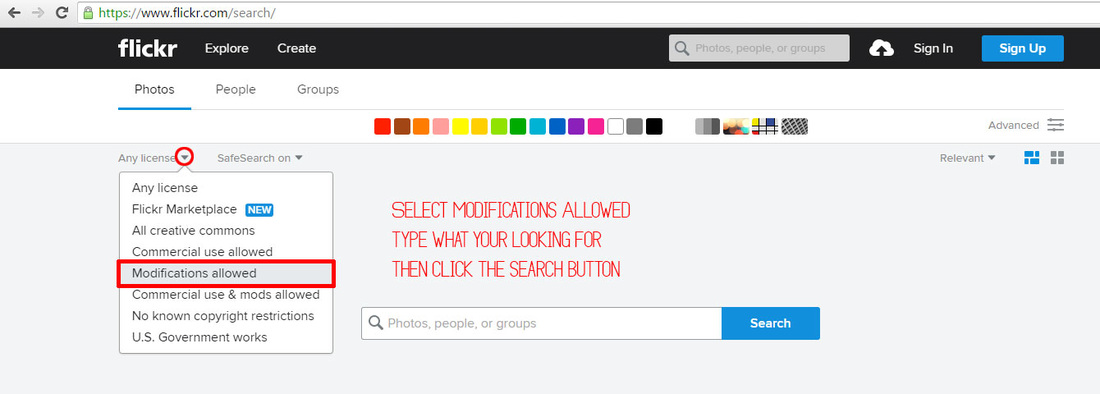
Find a photo you might want to use and click on the photo.
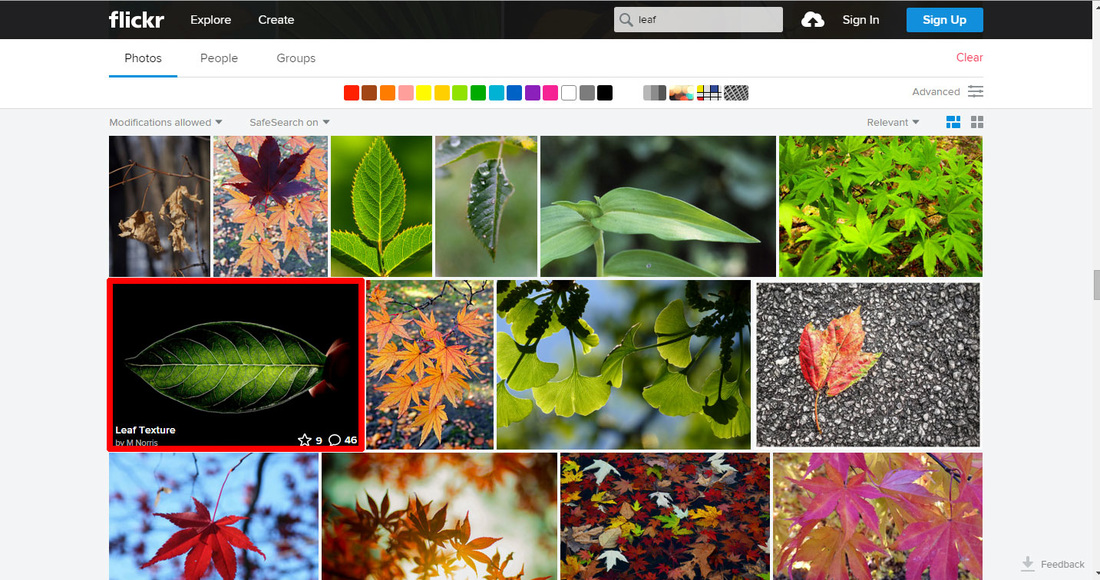
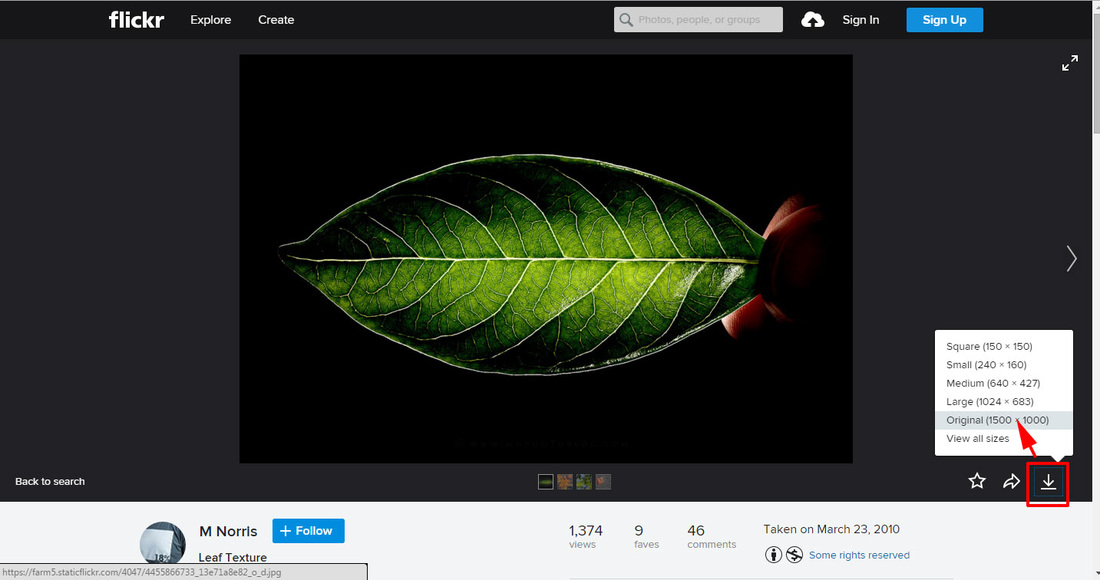
Download the largest version. It will be saved to the downloads folder on your computer. Open it up inside Photoshop
Art & Design Concepts in this lesson...
Elements and Principles of Art - Texture and Emphasis
Texture refers to the surface quality or "feel" of an object, such as roughness, smoothness, or softness. Actual texture can be felt while simulated textures are implied by the way the artist renders areas of the picture.
Emphasis refers to the points of interest where the viewer's eye is directed to emphasis important parts of the body of the work.
Nike Ad featuring Adrian Peterson that incorporates this type of idea in a commercial.
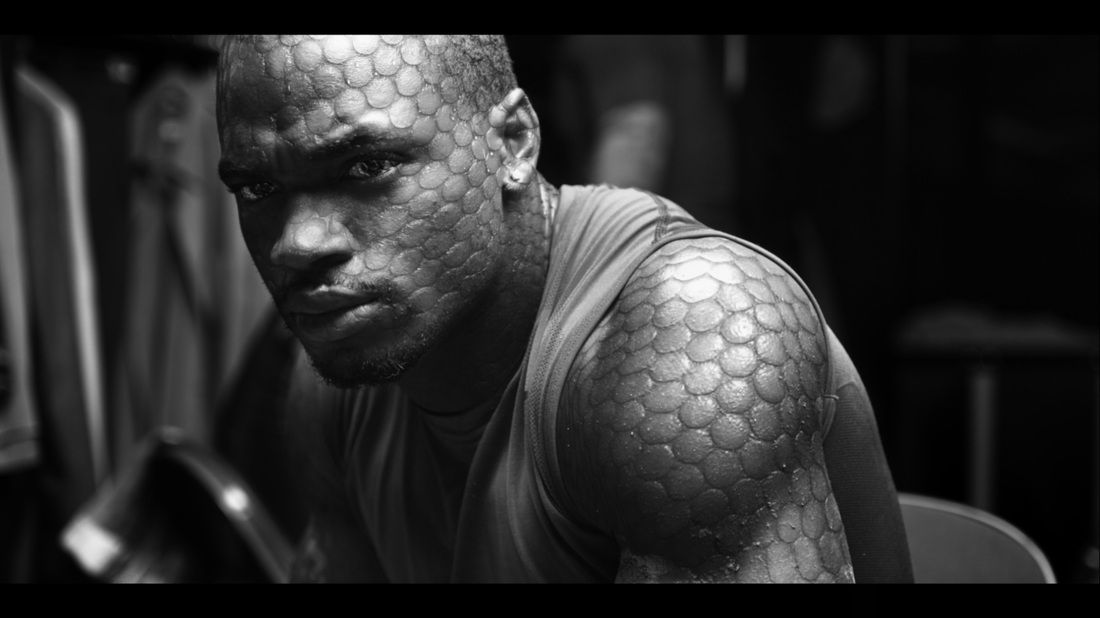
Check out this video
|
Step 1
Open up one of your images in Photoshop 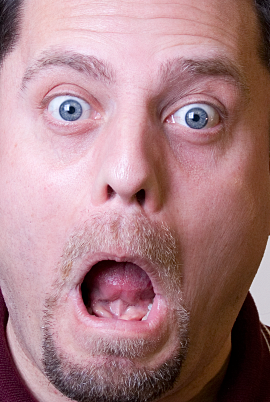
Step 2 In the Layers palette, click on the background layer (your face) to select this layer 
Step 3 Press (Control + J) to copy this layer 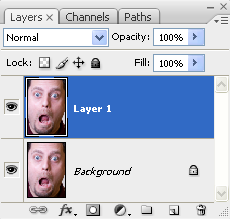
Step 4 Image menu > Adjust > Desaturate 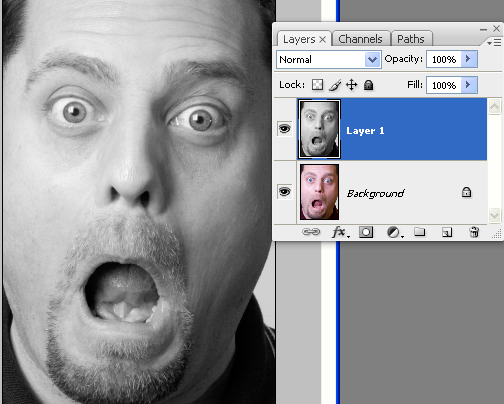
Step 5 We need to up the contrast and adjust the tones a little bit to this grayscale image. Let's add 2 adjustment layers: Adjustment layers allow you to change the look of the image below without actually destroying or changing image data Try and get your Brightness and Contrast Adjustment layer like this and the Curves like below. If these settings don't work on your image try different settings so the photo has some good dark and light areas. First, a Brightness/Contrast layer and then a Curves layer You can add each (one at a time) by going to Layer > New Adjustment Layer > Brightness/Contrast or Curves Screenshots for applying Brightness & Contrast Adjustment Layer seen below Then add a Curves Adjustment Layer - try a Preset like Strong Contrast or Medium Contrast Then click the OK button to apply the effect 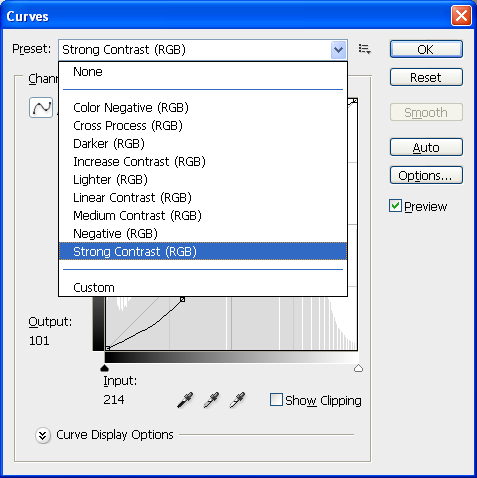
Step 6 Click on the Grayscale (image of you) layer and add a Layer Mask to this image Layer Menu > Add Layer Mask > Reveal All A Layer Mask is added to the Grayscale photo layer Step 7 Paint out an area (Eyes, hands, hair are example) using Black to reveal the color image below this layer. You can decide later if you want to keep this color visible, take it out or add a new eye color for example. 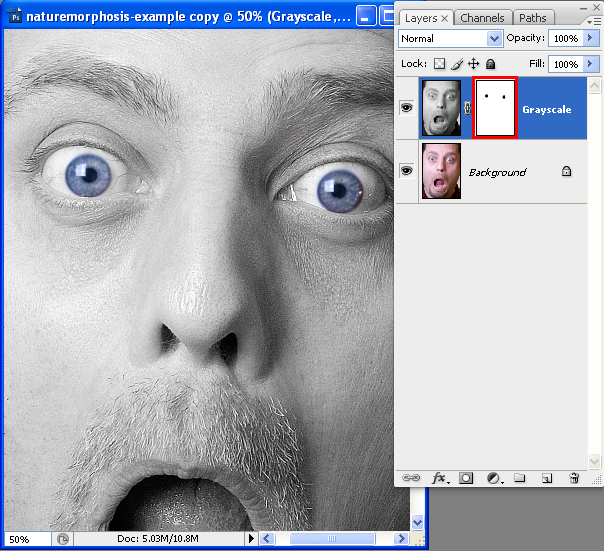
Step 8 Open a nature texture or animal skin you saved from
or located on Flickr images thru https://www.flickr.com/explore/ >Advanced Image > Creative Commons 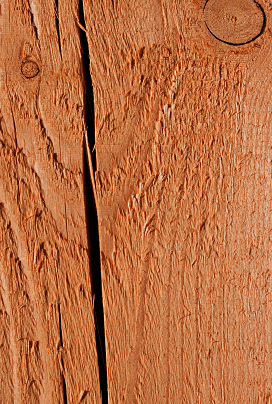
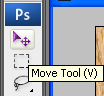
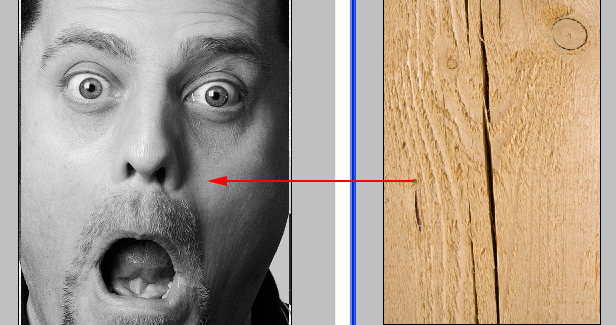
Step 9 Use the Move tool and drag and drop the nature texture or animal skin on top of your face
Step 10 Resize or rotate this to fit your face if needed using the Edit Menu > Free Transform tool 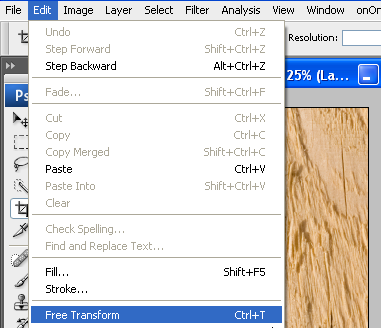
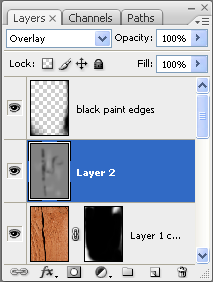
Step 11 Change the Layer blend mode to Multiply on this layer and lower the opacity to somewhere around 80%. This could be lower or higher, it depends on what looks good for your image. 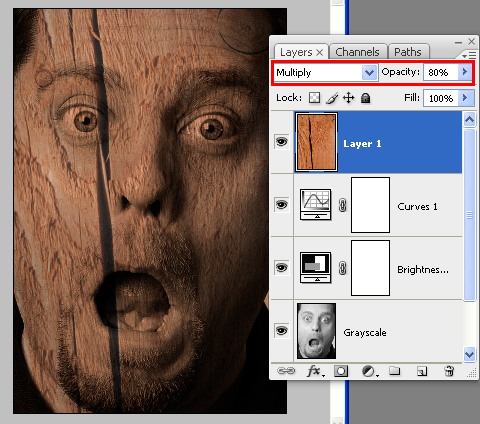
Step 12 Again add a Layer Mask to the image and paint out with Black the same selective area you did in Step 7 (eyes, hands, hair, etc) 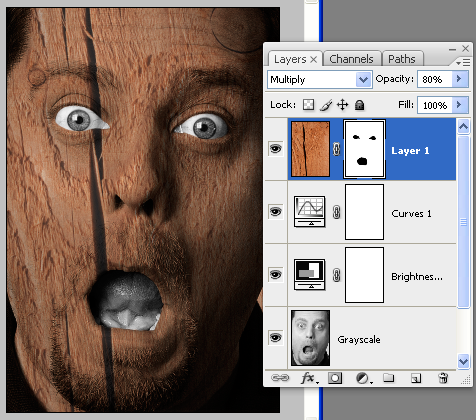
Step 13 Copy this Layer (Control + J) and set the Layer Blending mode to Overlay. Adjust the Opacity of this layer to around 30-40%. Again, this could be lower or higher, it depends on what looks good for your image. 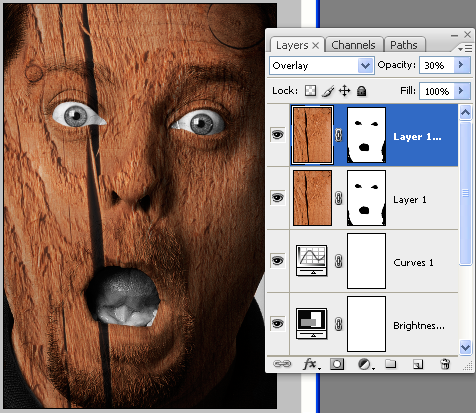
Step 14 Finally, add a New Blank layer (Layer > New) and fill with 50% gray Now use the Dodge and Burn Tools to increase the highlights if needed and more importantly darken the shadow areas.
Look at areas around your nose, under your mouth, under your chin to darken (use Burn Tool) Look at the top of the nose, cheeks, chin, and forehead to lighten (use Dodge Tool)
Step 15 Final Image after Dodging & Burning 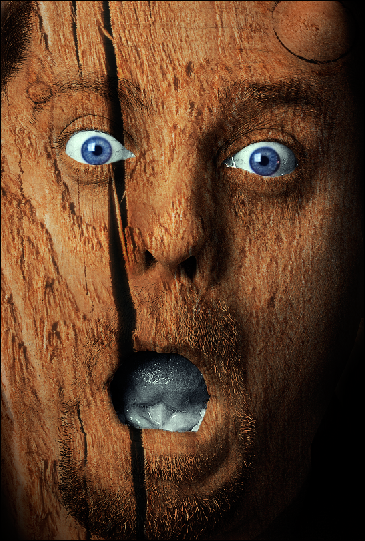
|

Step 16
Save image to your Google Drive folder as Naturemorphosis1.psd when finished.
Turn in the Naturemorphosis1.psd, Naturemorphosis2.psd and Naturemorphosis3.psd on Google Classroom.
Save these PSD files as JPG files also.
Turn in the Naturemorphosis1.jpg, Naturemorphosis2.jpg and Naturemorphosis3.jpg on Google Classroom.
Repeat this entire process (ALL STEPS ABOVE) on 2 different images of yourself and make sure to select a different nature texture or animal skin. Save them as Your Last Name_Naturemorphosis2.psd and Your Last Name_Naturemorphosis3.psd on your Google Drive when finished
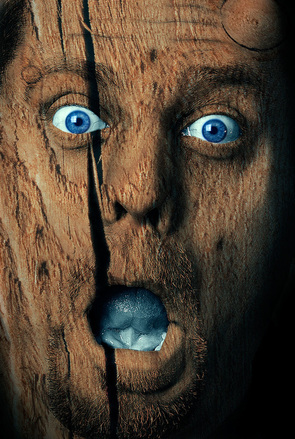
Naturemorphosis 1
|
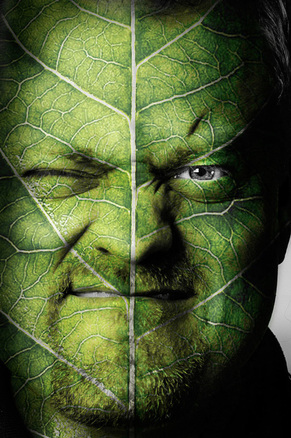
Naturemorphosis 2
|
Naturemorphosis 3
|
