Techno Person Photomontage
A Photomontage is a multi-image picture created by a photographic film or digital process. Photomontage works are often constructed to convey a message, whether that be a commentary on political, social, or other issues. When done correctly, they can have a dramatic impact.
|
|
In the arts, a theme is a broad idea or a message conveyed by a work.
Themes in art are often messages about life, society or human nature, and are usually implied rather than explicitly stated.
A theme is not the same as the subject of a work. For example, the subject of the movie Star Wars is a battle between the Galactic Empire and the Rebel Alliance, whereas the themes might be moral ambiguity or the conflict between technology and nature.- Source: Boundless. “Themes in Art.” Boundless, 26 May. 2016. Retrieved 24 Oct. 2016 from https://www.boundless.com/art-history/concepts/themes-in-art-0-6115/
The Photomontage you develop will be relating to a THEME to convey a message. This finished image investigates the different methods of representing the human body with technology (this also includes industrial or mechanical type photos). The final completed image will visually illustrate the combination of combining human and technology/mechanical attributes into a single being. For ideas think of the possibilities of genetic engineering, human cloning, the production of so-called "cyborgs" and the idea of "digital humans" in a futuristic era.
You can only use images from the following free stock photography websites:
Project Requirements & Objectives: Students will...
You can only use images from the following free stock photography websites:
- https://unsplash.com/
- https://www.pexels.com/
- https://pixabay.com/
- https://stocksnap.io/
Project Requirements & Objectives: Students will...
- Develop skills in digital imaging with Adobe Photoshop
- Produce a photomontage using Adobe Photoshop that uses a theme that revolves around humans and technology.
- Develop and utilize new skills we have learned in exercises with Photoshop (Layers, layer masking, layer blending modes, adjustment layers)
- Use multiple Layers (8 to 10) with this image
- Save correctly to your Google Drive when finished and submit to Google Classroom as a PSD file for grading.
Step 1
Download the Techno_Person.psd file from the Google Classroom post for this assignment. Save it to your Google Drive
Download the Techno_Person.psd file from the Google Classroom post for this assignment. Save it to your Google Drive
Step 2
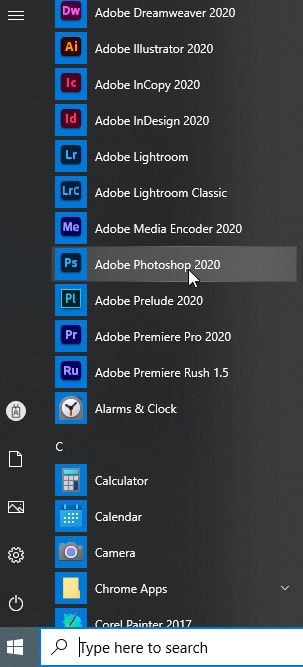
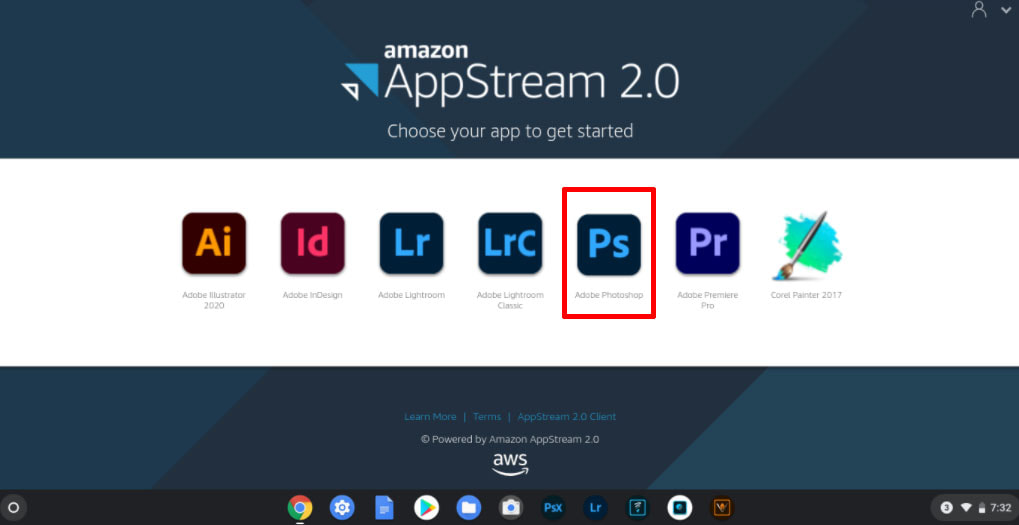
Open Photoshop 2020 on your computer or use the Amazon AppStream Digital Art link to open Photoshop on your Chromebook - See link to this HERE
Open Photoshop 2020 on your computer or use the Amazon AppStream Digital Art link to open Photoshop on your Chromebook - See link to this HERE
|
|
Step 3
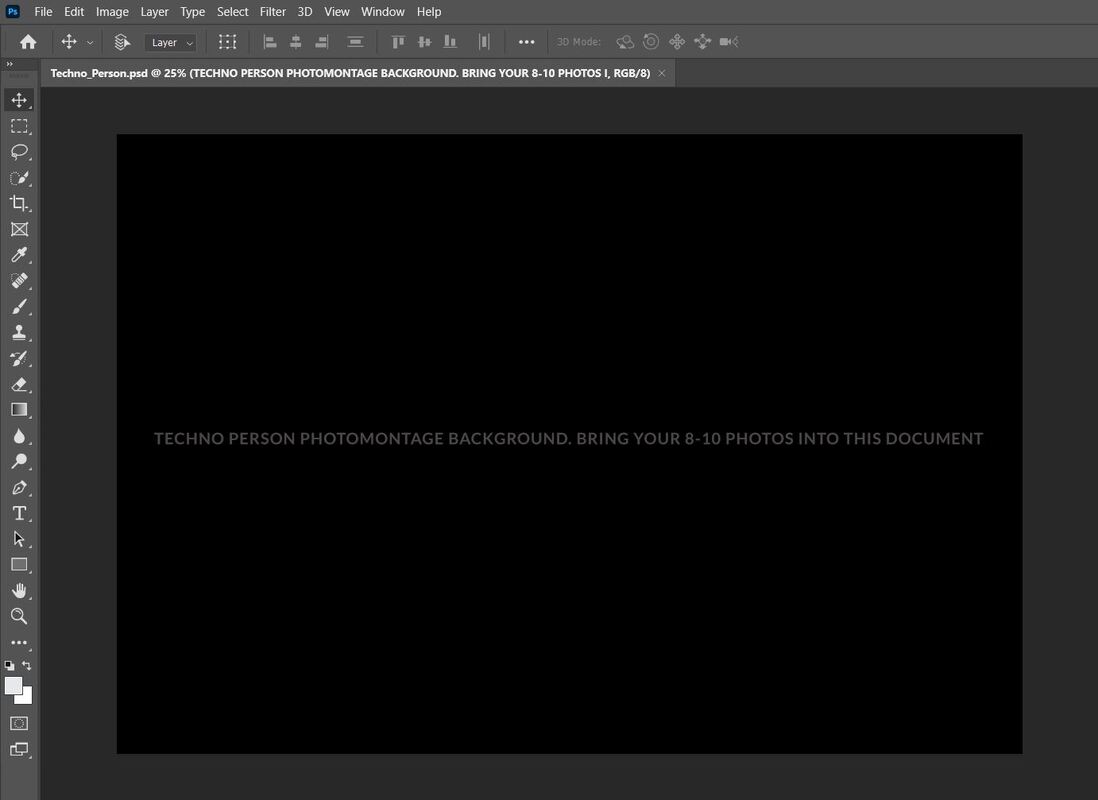
File Menu > Open > Techno_Person.psd. This is the starting background image where all 8-10 photos you use will be placed.
Right after you open the document please save it
File Menu > Save As > Techno_Person.psd to your Google Dive folder
File Menu > Open > Techno_Person.psd. This is the starting background image where all 8-10 photos you use will be placed.
Right after you open the document please save it
File Menu > Save As > Techno_Person.psd to your Google Dive folder
Step 4
Look for images of the following free stock photography sites to make your Techno Person Photomontage:
- https://unsplash.com/
- https://www.pexels.com/
- https://pixabay.com/
- https://stocksnap.io/
On these websites please SEARCH for the following types of images:
- humans, people, faces, hands, eyes
- computer chips, circuits, wires, ports, electronics, digital backgrounds, technology, hardware,
- mechanical machines, machine parts, gears, electric pipes, outlets, rusty pipes, factory parts, construction machinery, gauges, rusty machine parts, engines,
- peeling paint, rust, old metal, concrete, old rustic pipes, textured wall, decay
Open them up inside Photoshop and Save the ones that could be used in creating your image to your Google drive folder. After opening an image you like go to File > Save As > Google drive > click Save
You must use a minimum of 8 images for this project, but no more than 10. The background does not count as one of these photos.
Now that you have your images saved to your Google Drive folder, begin to create this image. This image will be put together using the techniques we learned in the exercises using filters, layers, layer masking, blend modes and other techniques from the exercises we have done so far.
Step 5
After you open the document - Before doing anything to your project please save it.
File Menu > Save As > technoperson.PSD to your Google Dive folder as well.
After you open the document - Before doing anything to your project please save it.
File Menu > Save As > technoperson.PSD to your Google Dive folder as well.
Step 6
Open one of the photos you saved in Step 3 that you could maybe Select and Extract out of its background. Follow the steps from the Selections Exercises. See photos below for an example of doing this.
Open one of the photos you saved in Step 3 that you could maybe Select and Extract out of its background. Follow the steps from the Selections Exercises. See photos below for an example of doing this.
Use the Quick Selection Brush to select the pipes from this mechanical photo
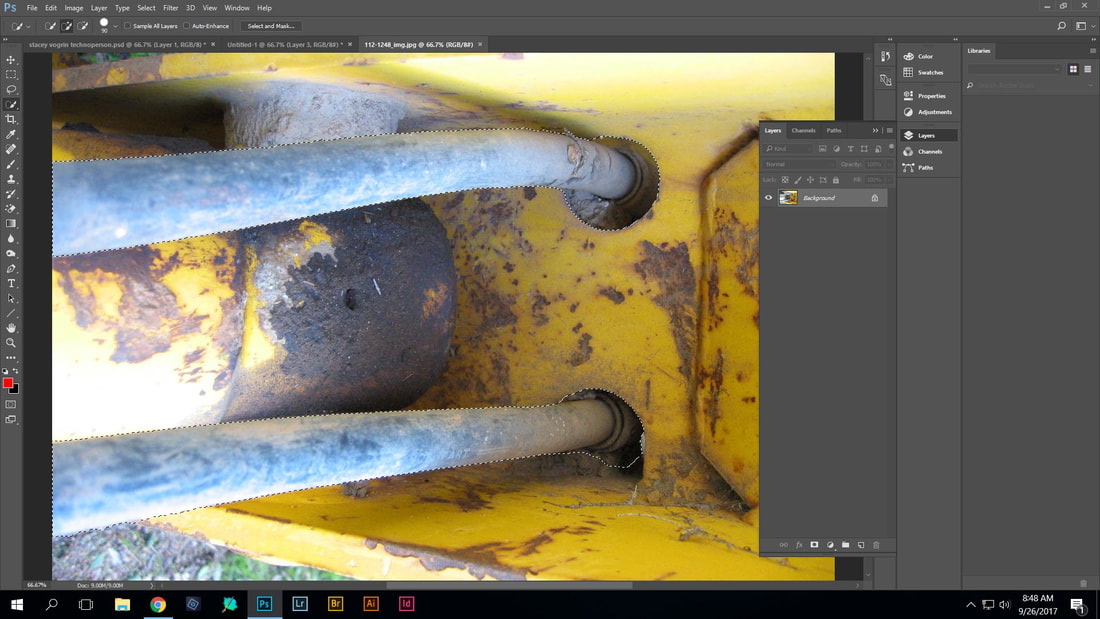
Go to Select Menu > Select and Mask to refine the edges of a selection
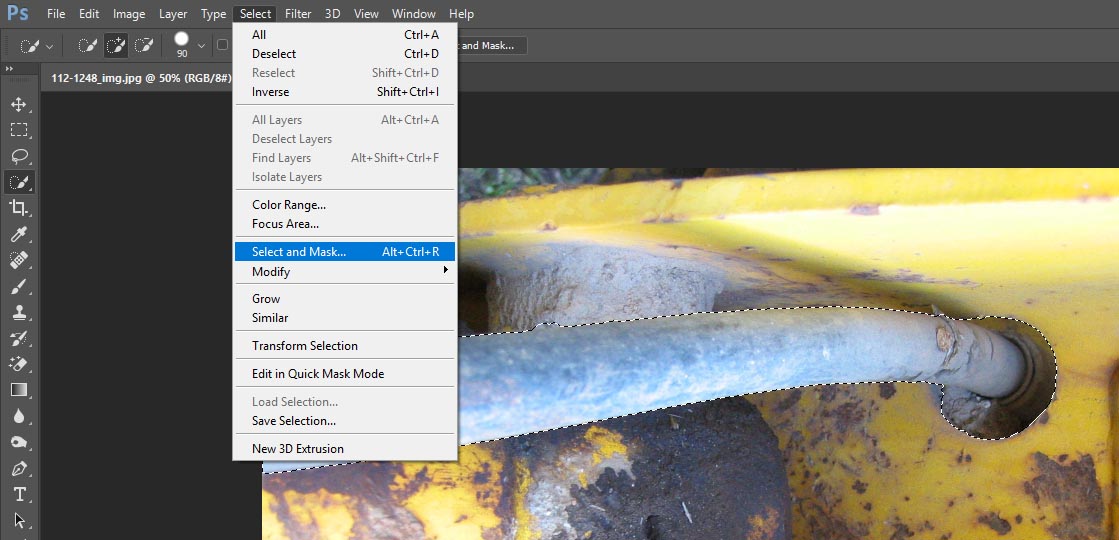
Make adjustments in the Refine Edge dialog box like we did in the Selections exercise


click on image for larger version
Step 7
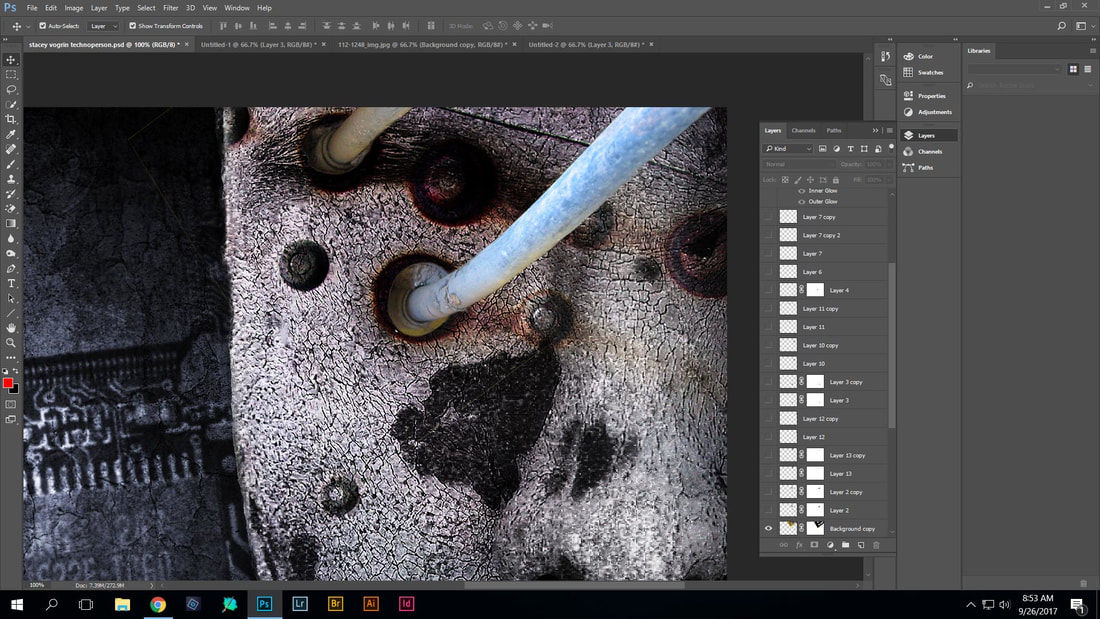
Open one of the multiple photos you saved in Step 3
Drag and Drop photos into this document using the Move tool in Photoshop.
*Remember you need to use at least 7 and no more than 12 total photos.
Select the Move Tool and check both of these Auto Select and Show Transform Tools
Open one of the multiple photos you saved in Step 3
Drag and Drop photos into this document using the Move tool in Photoshop.
*Remember you need to use at least 7 and no more than 12 total photos.
Select the Move Tool and check both of these Auto Select and Show Transform Tools
With the Move Tool click on the open photos and drag and drop them into the TechnoPerson.psdfile one at a time.
Step 8
Resize photos if they are too large using this technique...Using the Move tool click the photo and then click on Maintain aspect ratio button in the Options bar area.
Click on the image and drag inward on the photo to make it smaller. Hit the Enter Key when you have the new desired size.
Step 9
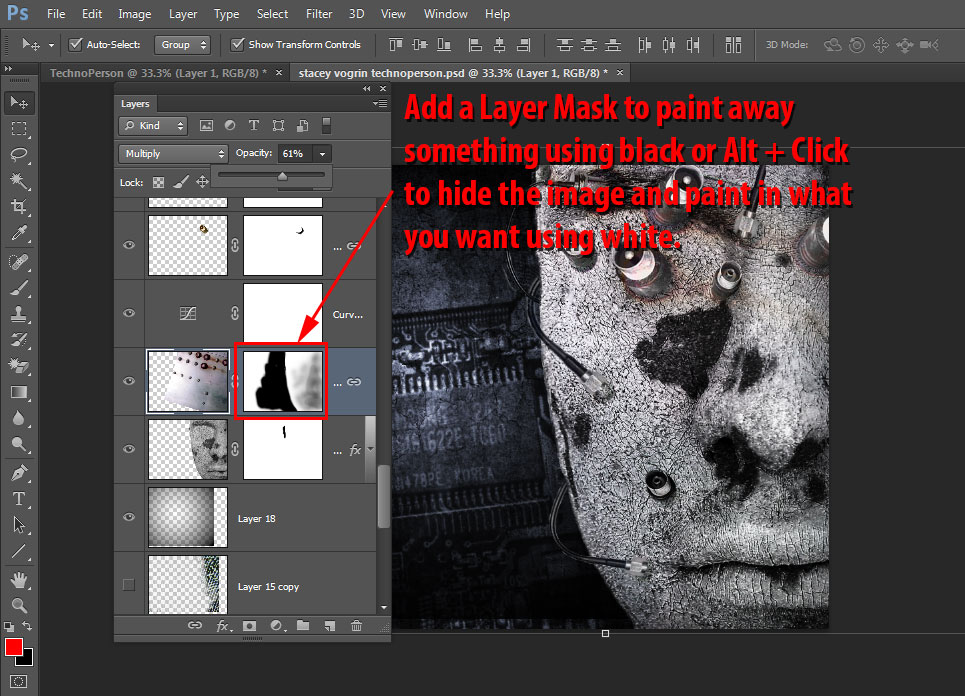
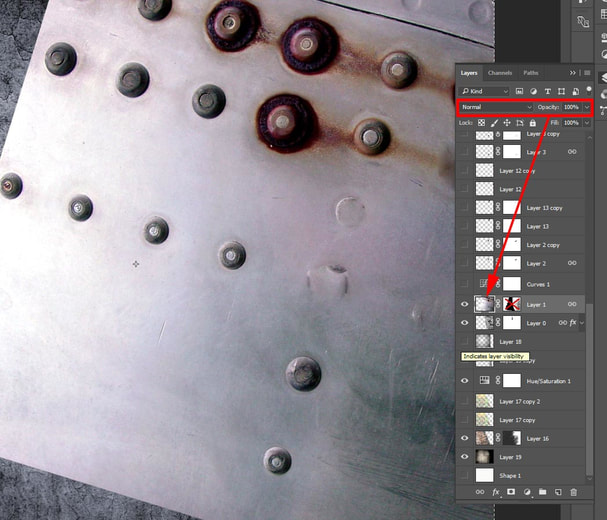
Add Layer Masks to the photos in the Layers palette and begin to MASK out or hide areas of the photos by painting you don't want visible with the Brush tool. Remember you did in the Layer Masking exercise.
* Remember that you need Black as your selected color to hide parts of the photo.
Add Layer Masks to the photos in the Layers palette and begin to MASK out or hide areas of the photos by painting you don't want visible with the Brush tool. Remember you did in the Layer Masking exercise.
* Remember that you need Black as your selected color to hide parts of the photo.
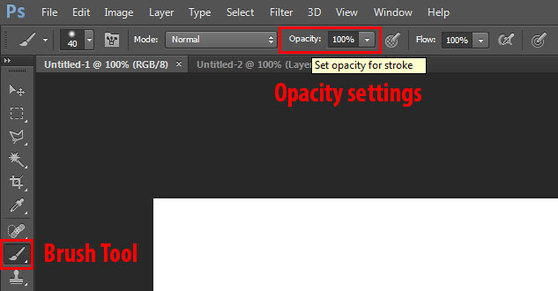
Select the Brush Tool
The Opacity of the brush along with the Wacom tablet will give you more control of how much you mask and how quickly it goes away.
The Options bar controls these settings.
The Opacity of the brush along with the Wacom tablet will give you more control of how much you mask and how quickly it goes away.
The Options bar controls these settings.
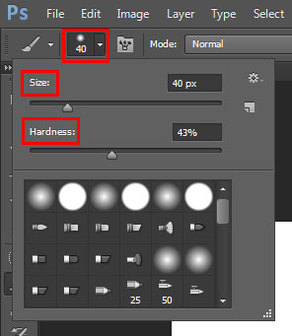
Remember to adjust your Brush Size and the Hardness 0 = soft edge or 100 = hard edge depending on the look you desire.
Step 10
Zoom in or out (CTRL + to zoom in and CTRL - to zoom out) to things in your image very easy on screen. Hold down the Spacebar to move your zoomed in document around to different parts of the document.
Zoom in or out (CTRL + to zoom in and CTRL - to zoom out) to things in your image very easy on screen. Hold down the Spacebar to move your zoomed in document around to different parts of the document.
Step 11
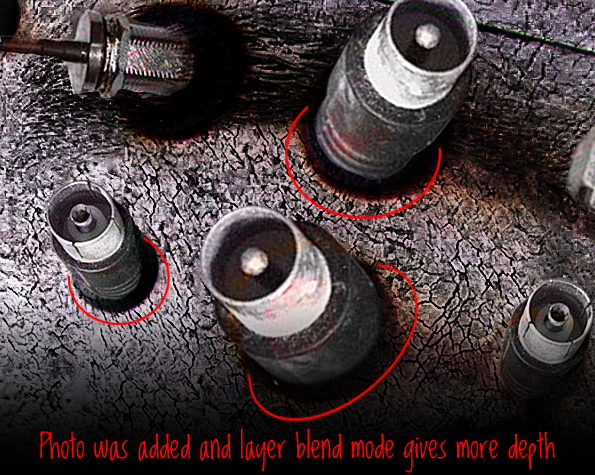
Use Layer Blend Modes and Opacity changes to mix photos together in a different manner. Remember you do this in the Layer Blend Mode exercise
Use Layer Blend Modes and Opacity changes to mix photos together in a different manner. Remember you do this in the Layer Blend Mode exercise
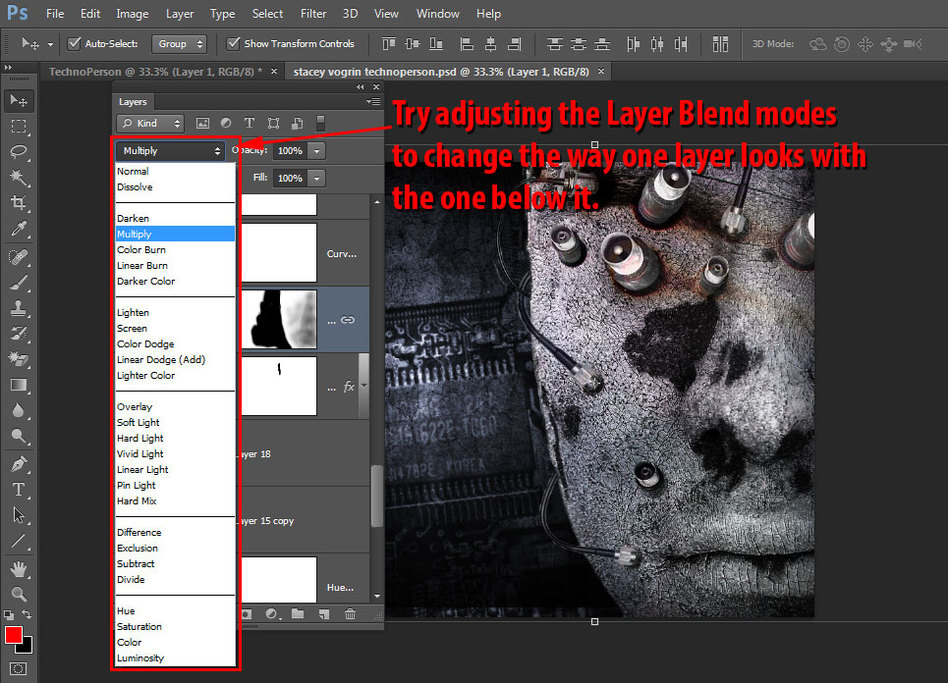
Layer Opacity can be lowered to make an image semi-transparent (see thru)

Step 12
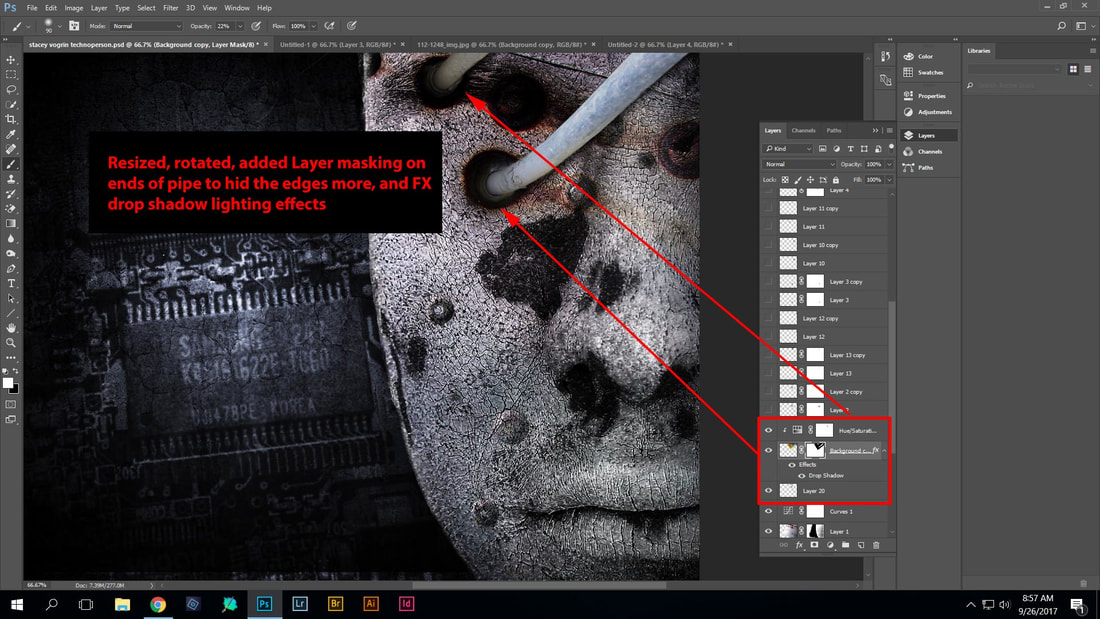
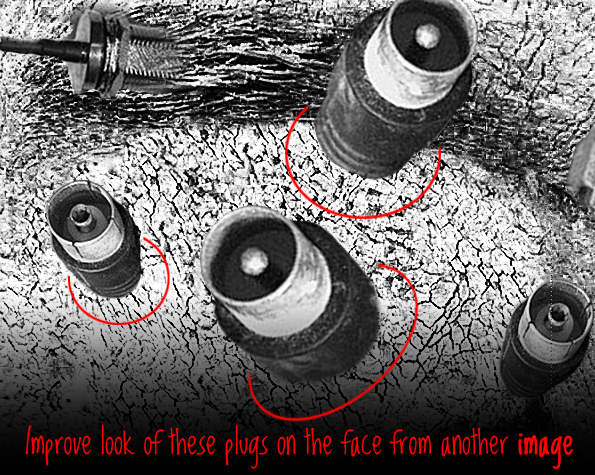
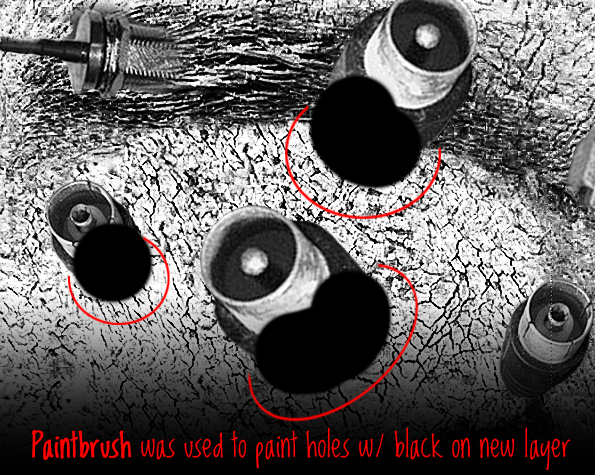
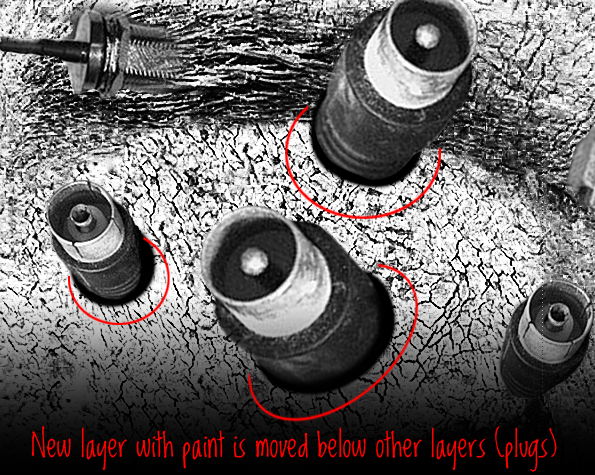
Create realistic looking embedded wires, holes, and drop shadows on face. Add a shadow (paint, photo or edge to add depth)
Make a hole from a photo
Create realistic looking embedded wires, holes, and drop shadows on face. Add a shadow (paint, photo or edge to add depth)
Make a hole from a photo
|
|
Make a hole from paint
|
|
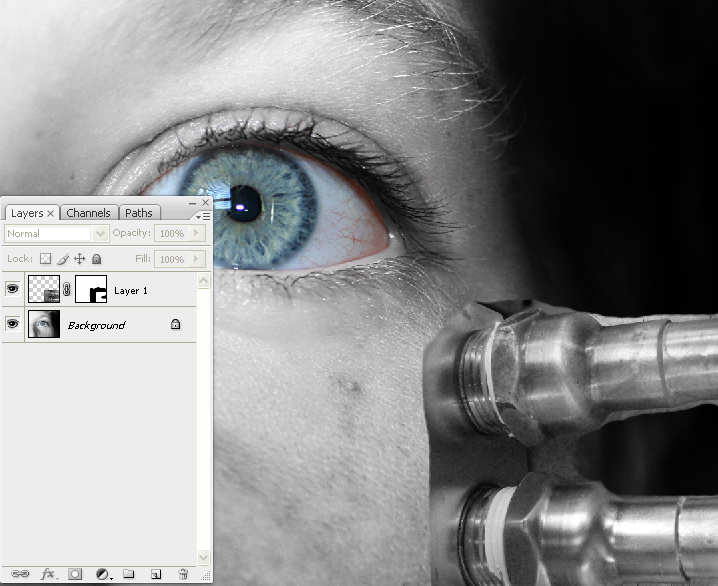
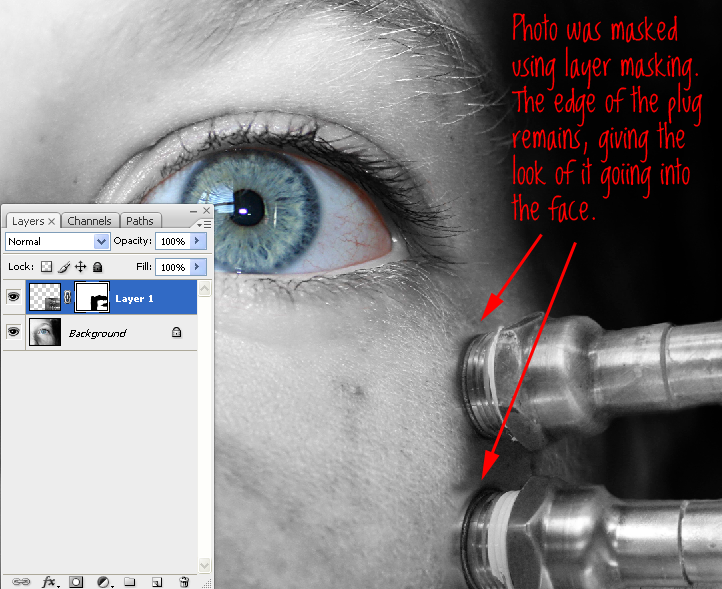
Use the edge of a photo to make a realistic embedded plug into the face
|
|
|
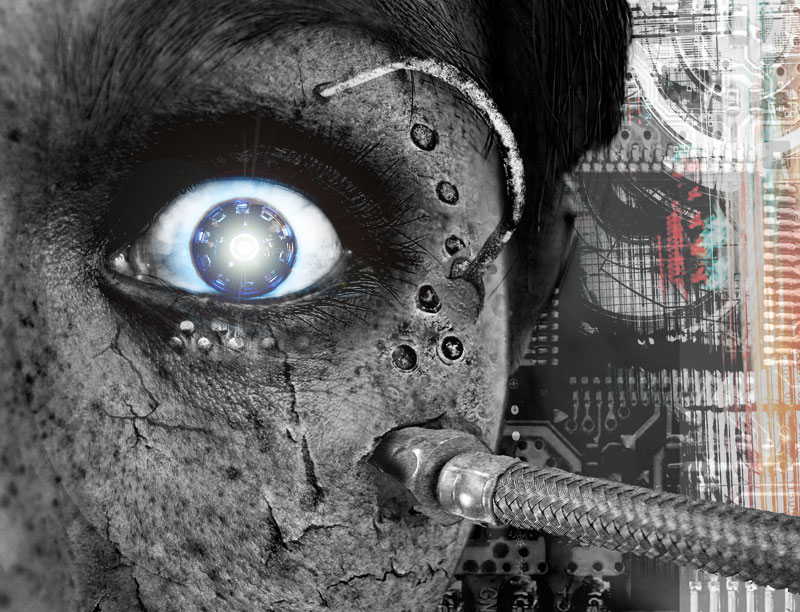
Good Example of these techniques seen here

|
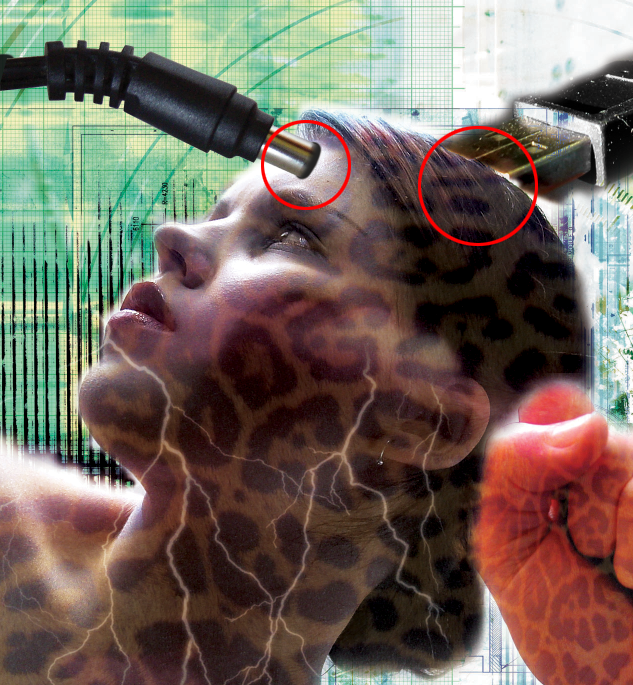
Bad Example (did not use these techniques) looks like the plug is floating above the image not embedded into the face.
|
Step 13
When completed Save as Techno_Person.psd to your Google Drive folder
Then turn in this document into Google Classroom for grading
When completed Save as Techno_Person.psd to your Google Drive folder
Then turn in this document into Google Classroom for grading
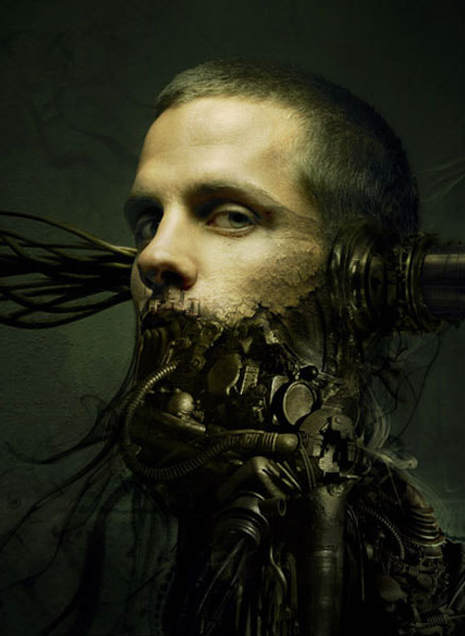
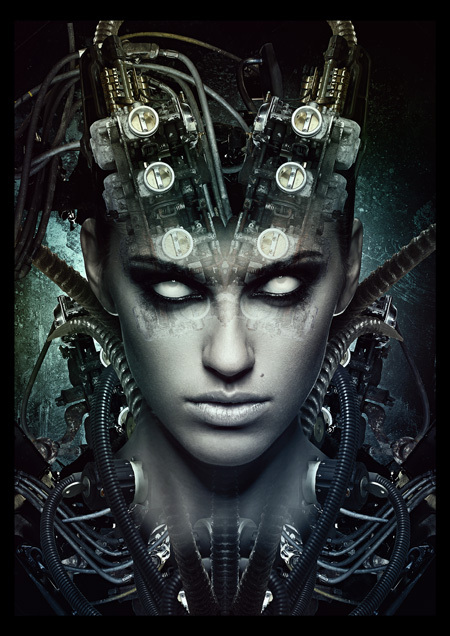
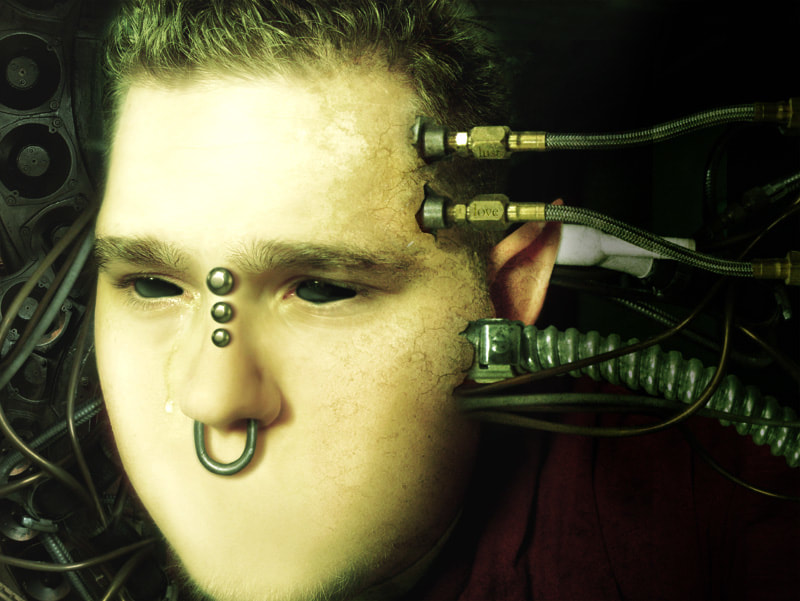
Student Examples
