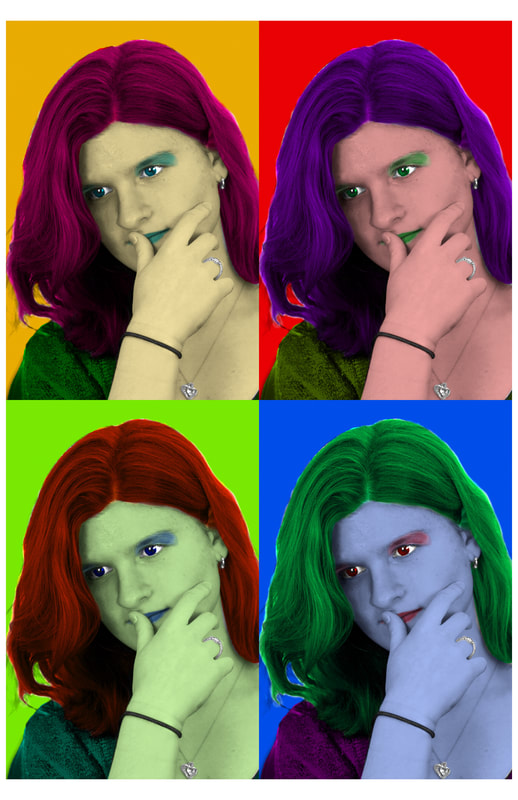
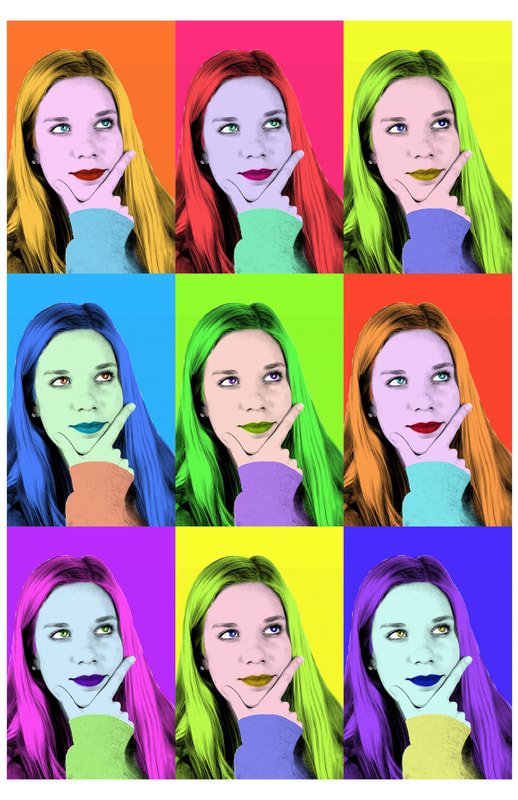
POP Art "Andy Warhol" Digital Silkscreen 2023
|
|
WATCH THIS VIDEO ABOUT ANDY WARHOL AND POP ART
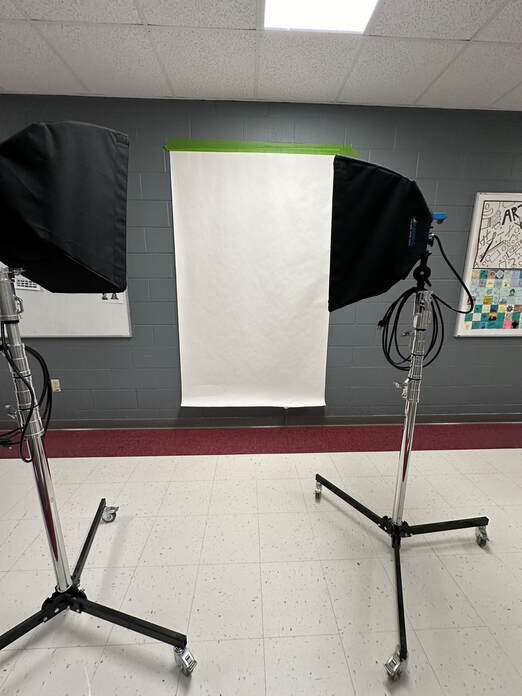
Photos - To begin...
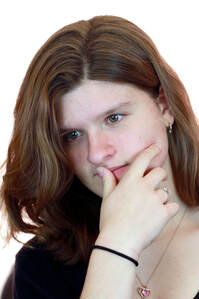
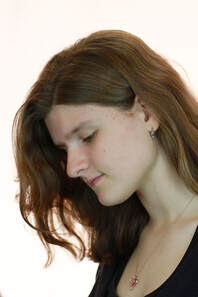
Take a few Portraits of yourself out in the hallway against the white backdrop with the studio lighting.
|
|
Step 1
Open Photoshop and then open the 1 photo of yourself you like best to use for this assignment.
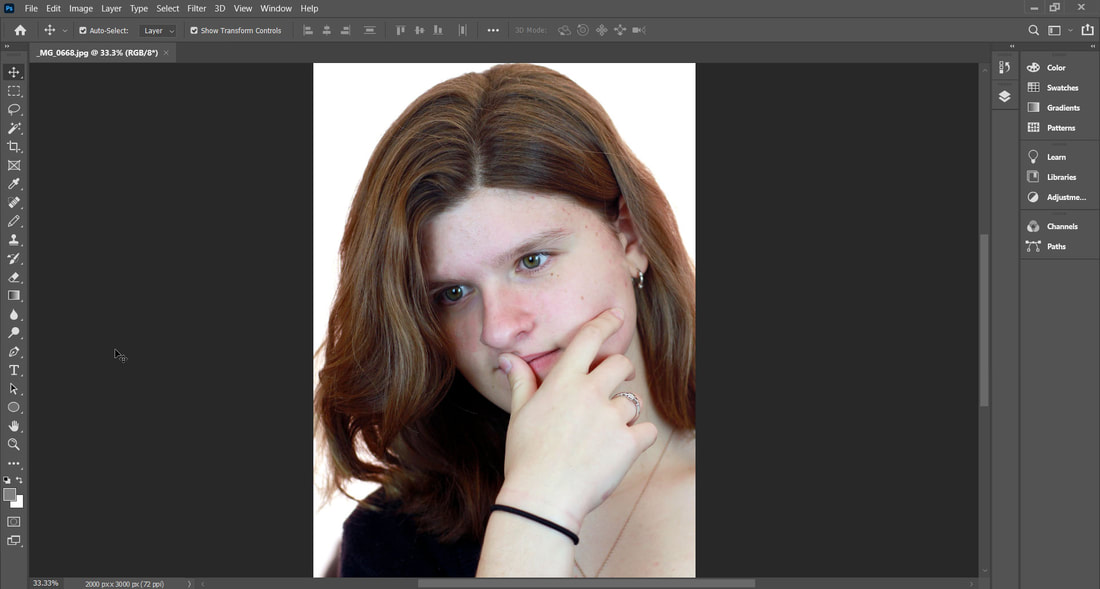
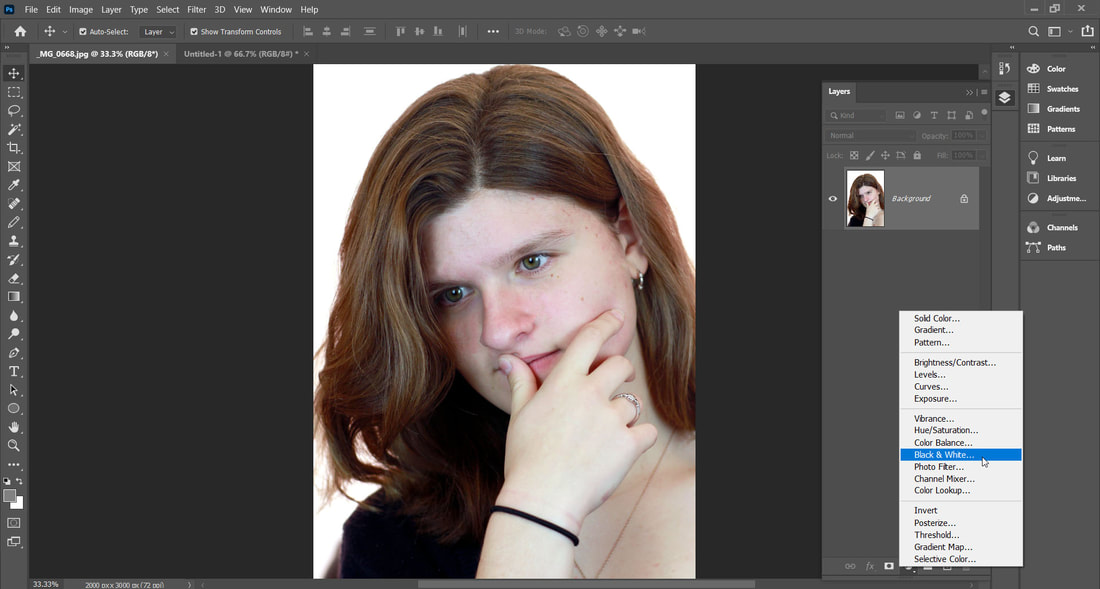
Step 2
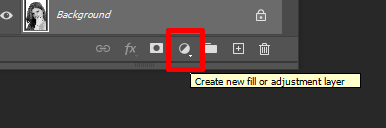
Make your photo Black and White by adding a Black and White Adjustment Layer
|
To add an Adjustment Layer click the icon at the bottom of the Layer Panel
|
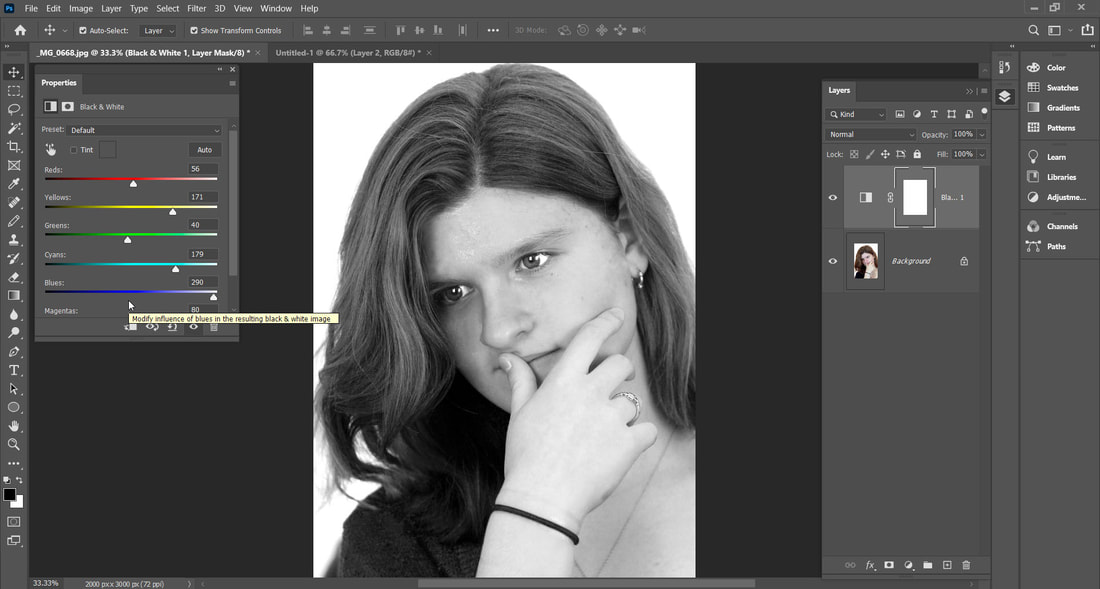
Adjust the sliders in the Properties Panel to get the best looking grey values in this photo. Go to Window > Properties if this panel is not open on your screen.
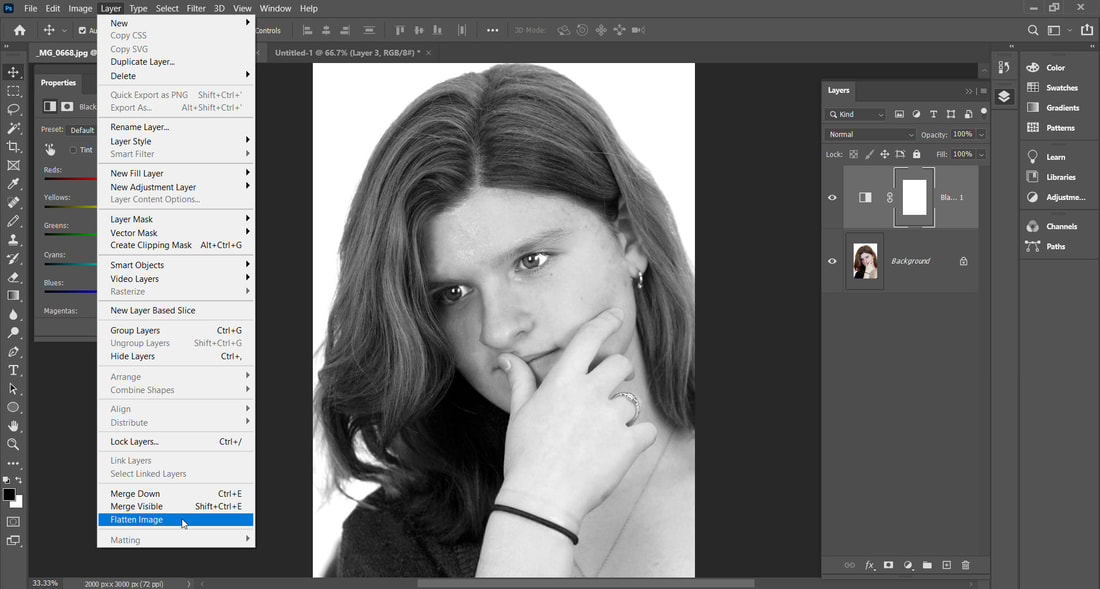
Step 3
Layer Menu > Flatten Image
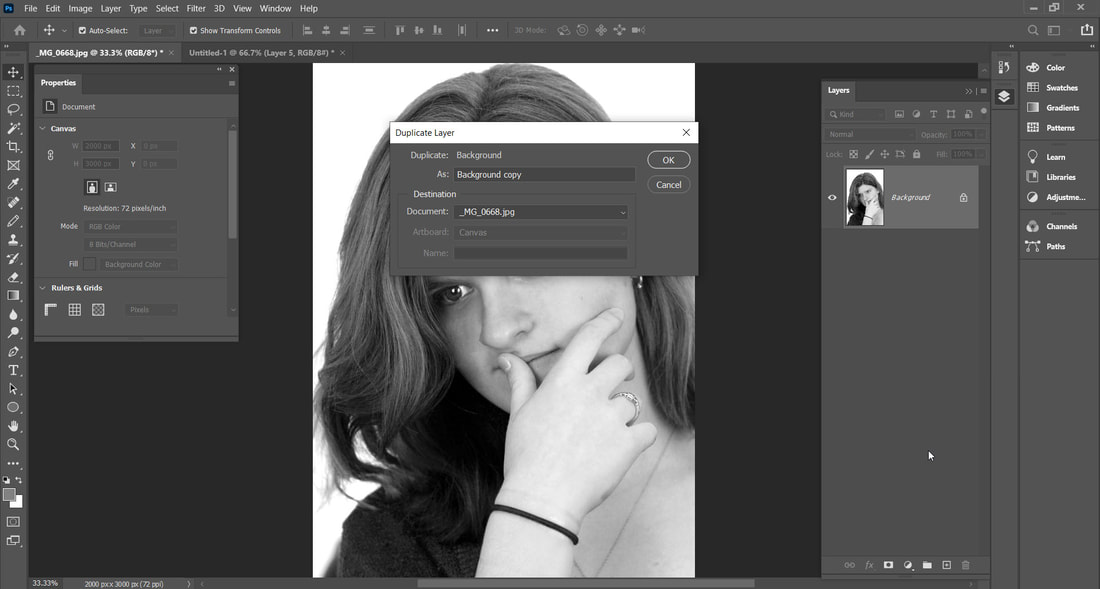
Step 4
Duplicate this layer by going to the Layer Menu > Duplicate Layer or just press CRTL + J keys on the keyboard
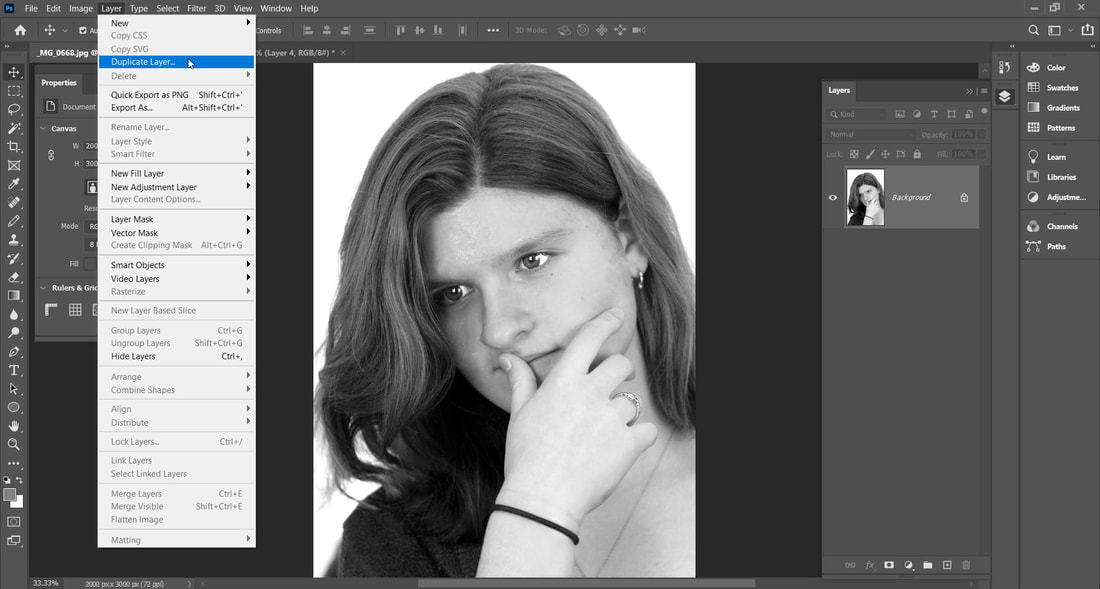
Press OK if this dialog box appears
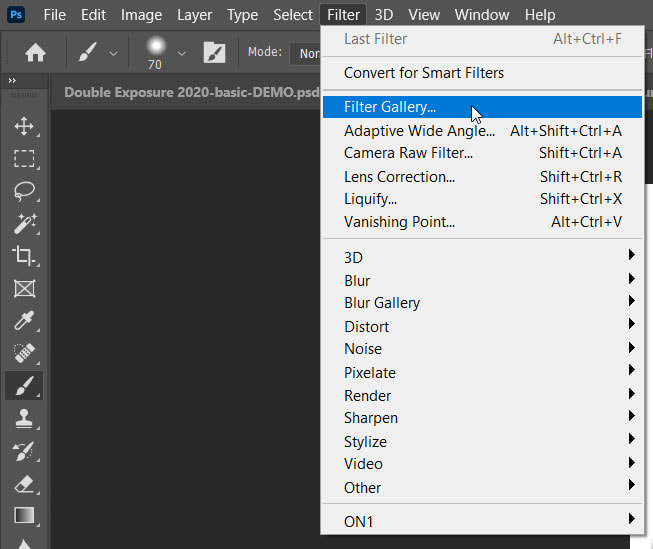
Step 5
Go to the Filter Menu > Filter Gallery > Sketch > Halftone pattern > Dot
|
Open the Sketch folder
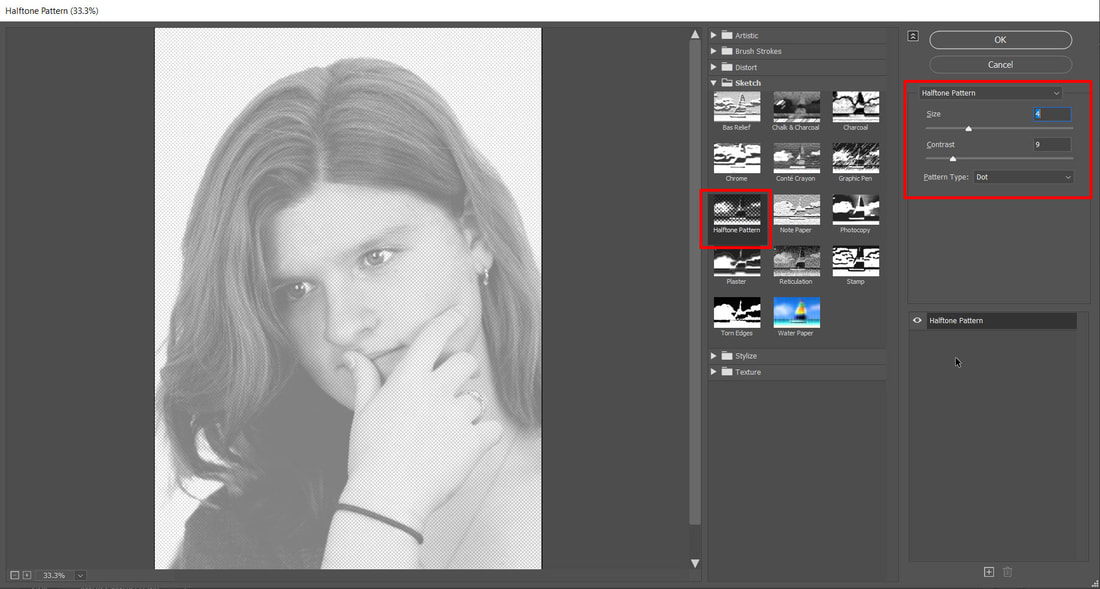
Select Halftone Pattern
Size 4 or 5
Contrast 20
Type Dot
Click OK
Select Halftone Pattern
Size 4 or 5
Contrast 20
Type Dot
Click OK
Step 6
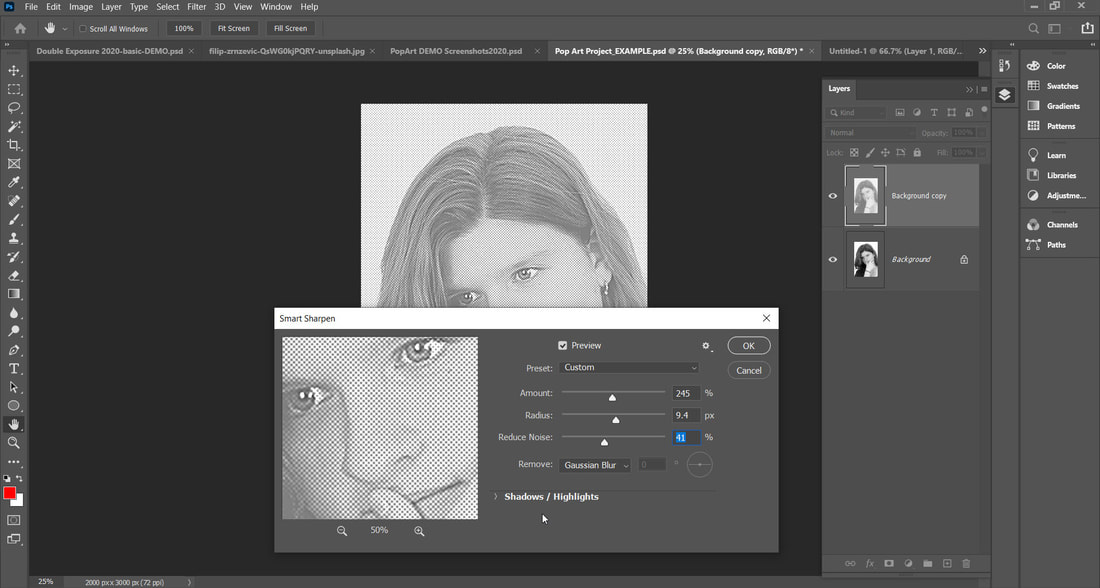
Go to the Filter Menu > Sharpen > Smart Sharpen
Amount between 200 - 250%
Radius 5 - 10px
Reduce Noise 40%
Remove > Gaussian Blur
Click OK
Amount between 200 - 250%
Radius 5 - 10px
Reduce Noise 40%
Remove > Gaussian Blur
Click OK
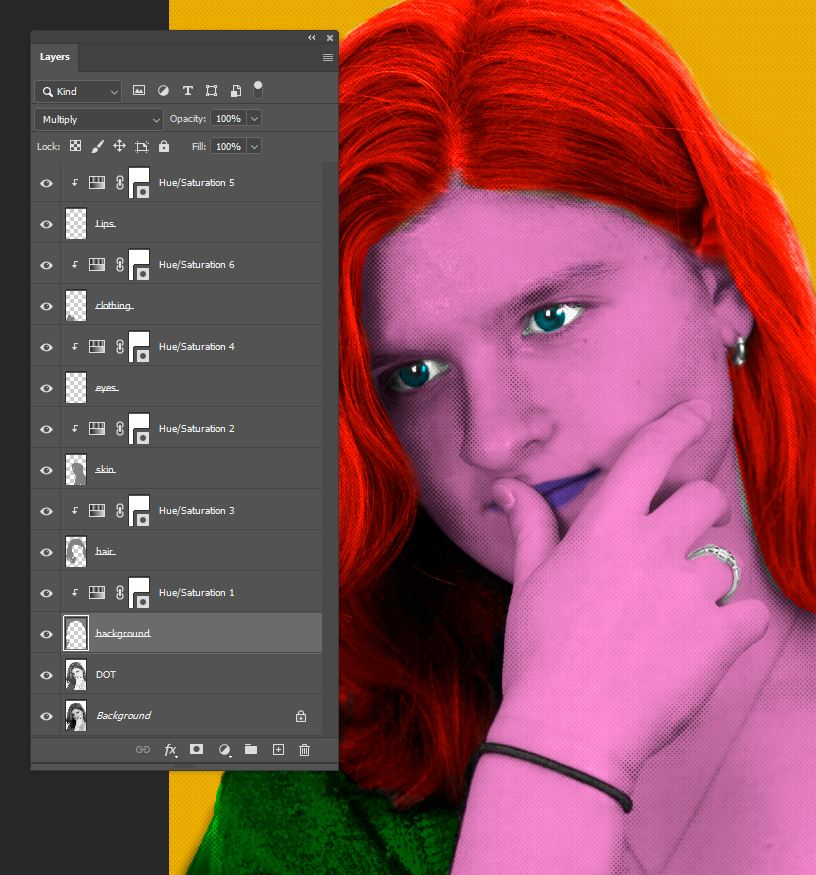
Step 7
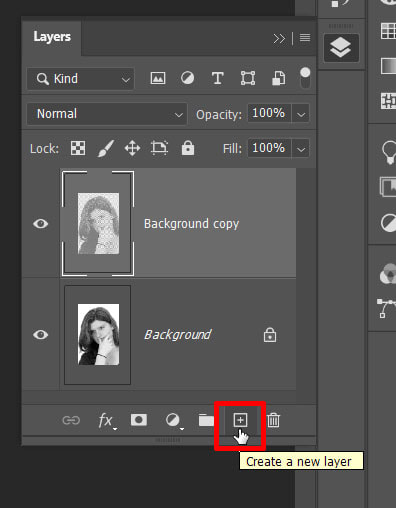
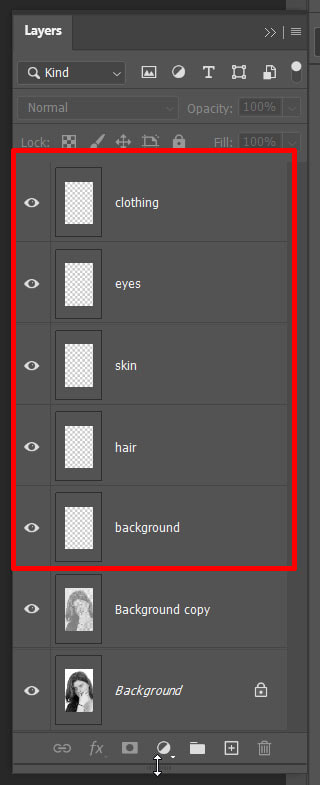
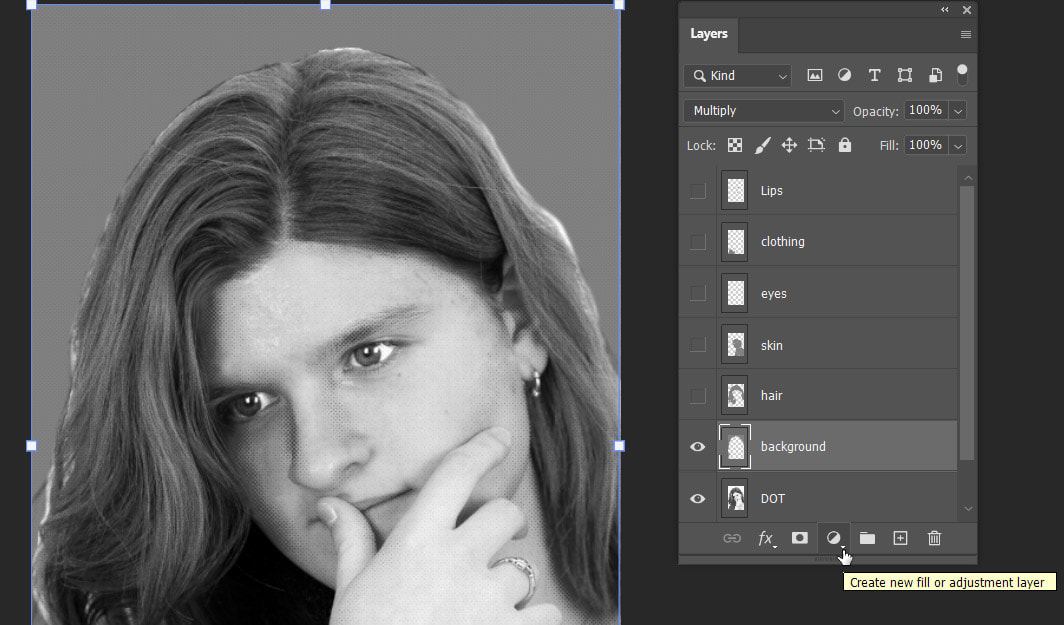
Make several blank layers for each area of the photo that will be colored
1. Click the Create new layer icon as many times as needed
2. Make all of these Layers Blending Mode set to the Multiply
3. The screenshot to the right shows the blank layers that were created and renaming those layers was also done (double click on the word layer 1 to rename it)
2. Make all of these Layers Blending Mode set to the Multiply
3. The screenshot to the right shows the blank layers that were created and renaming those layers was also done (double click on the word layer 1 to rename it)
1
|

2
|
3
|
Step 8
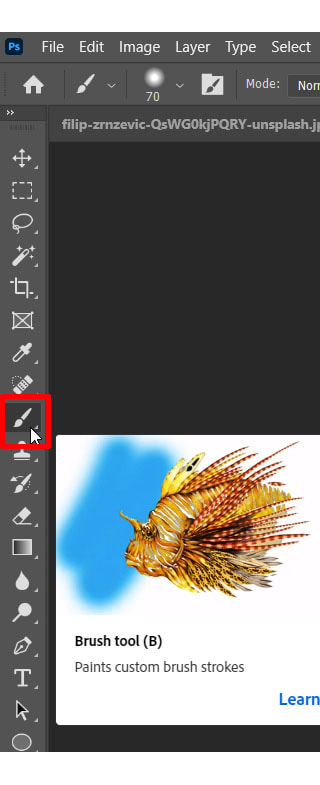
1. Select the Brush Tool
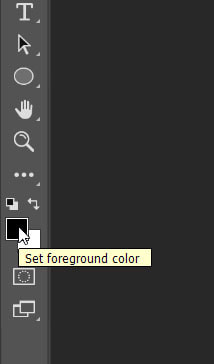
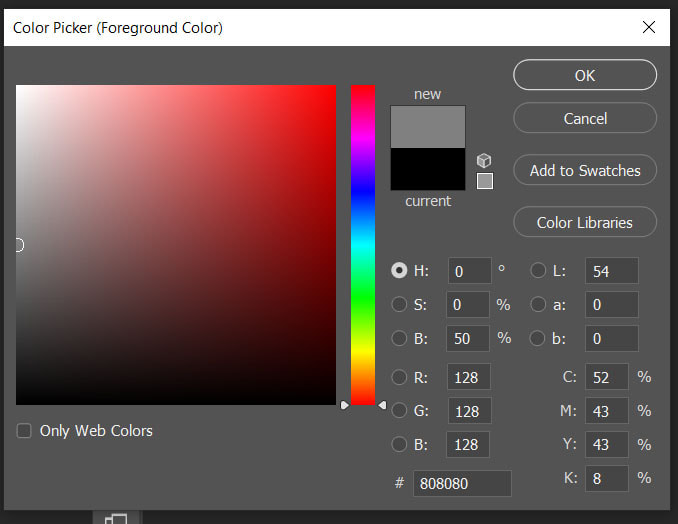
2. Click in the Foreground color box
3. Change to middle grey color (R 128, G 128, B 128)
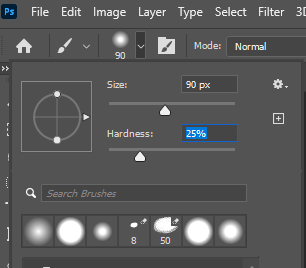
4. Adjust the Size of the brush bigger or smaller when needed for the photo.
5. Make the Brush Hardness around 25
2. Click in the Foreground color box
3. Change to middle grey color (R 128, G 128, B 128)
4. Adjust the Size of the brush bigger or smaller when needed for the photo.
5. Make the Brush Hardness around 25
1
|
2
|
3
|
4 & 5
|
Step 9
After painting grey in all these individual layers (background, hair, skin, etc.)
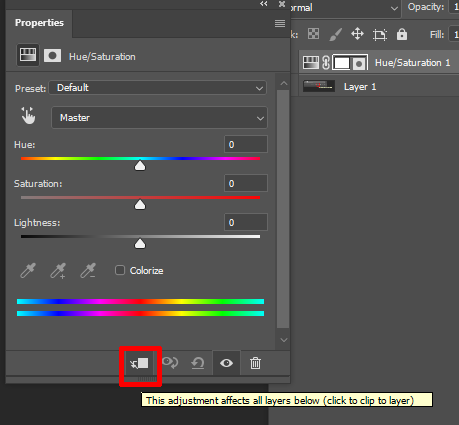
Select the background layer and add an Adjustment Layer > Hue/Saturation to change the grey to a color
Select the background layer and add an Adjustment Layer > Hue/Saturation to change the grey to a color
|

|
Make a Clipping Adjustment by clicking on this icon so the color you change to is only adjusted to the one layer below:
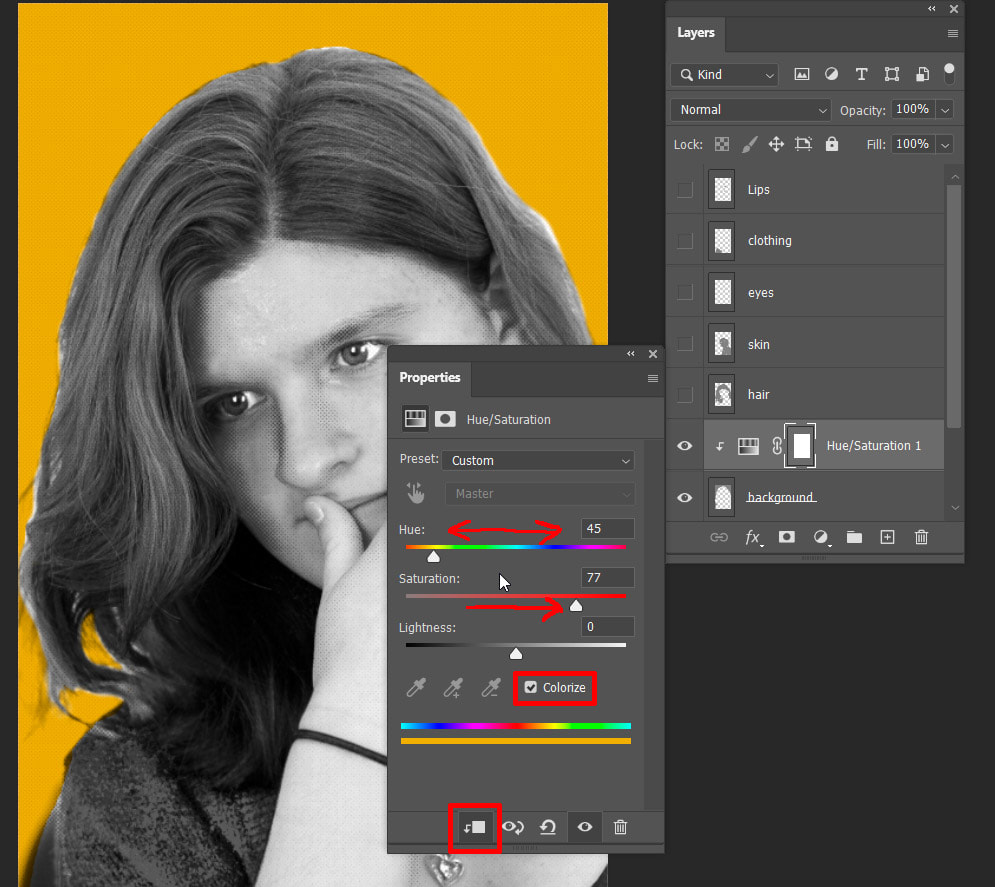
Step 10
Then repeat this step for all the other layers of grey that you painted, making each layer a new color